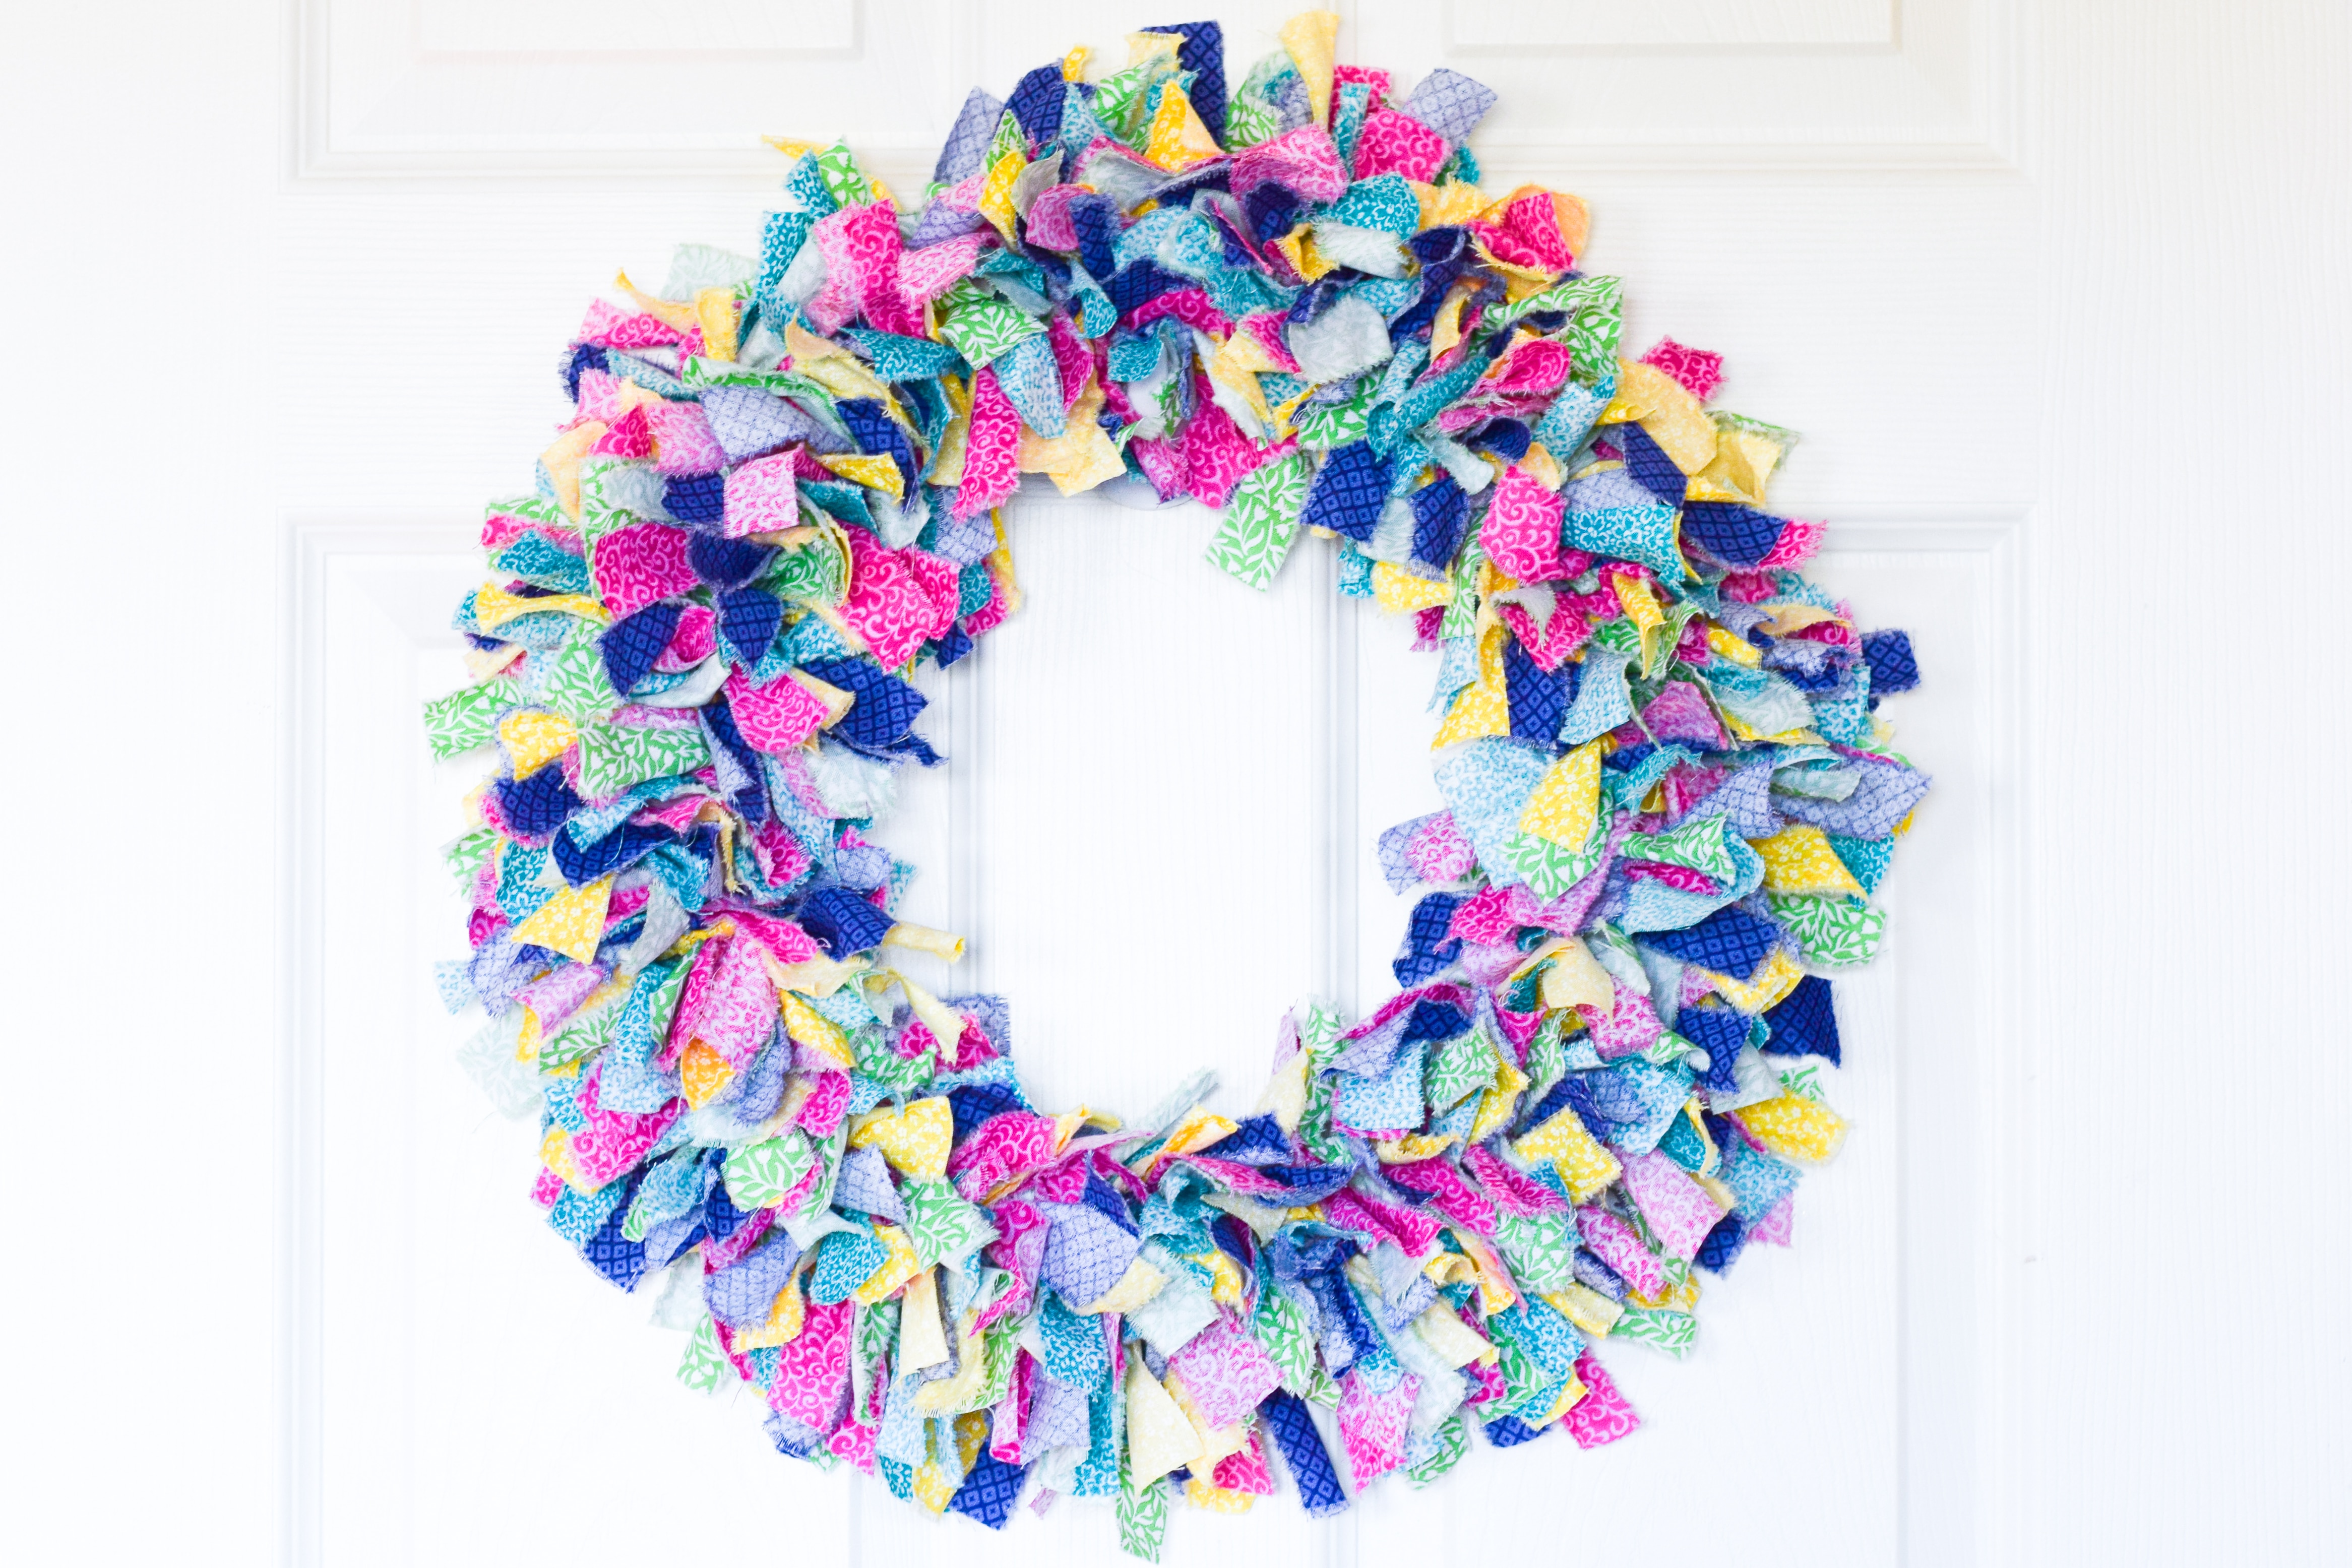
A fabric rag wreath is a fun way to add some color and texture to your front door!
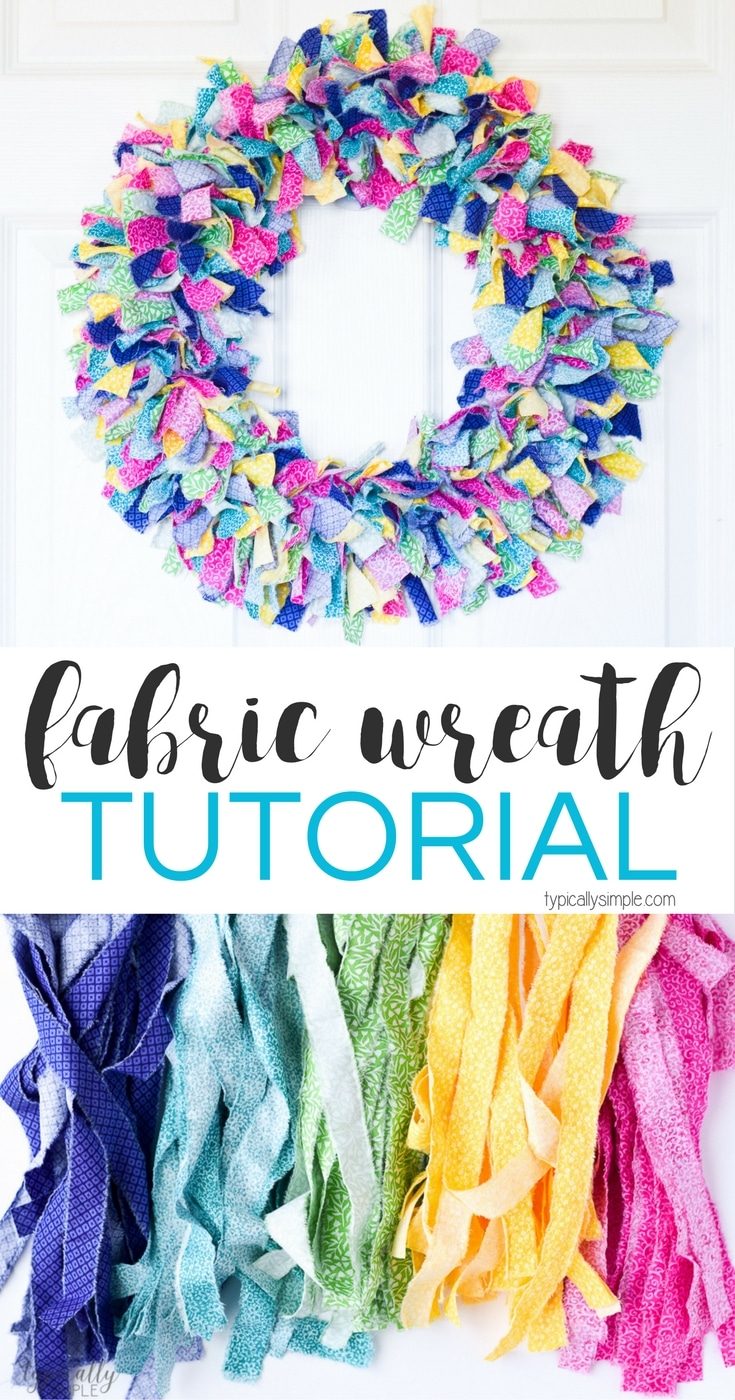
Last fall I went on a fun girls weekend trip where we spent two days crafting and scrapbooking. We decided to make fabric rag wreaths as one of our craft projects and ever since making that first one, I’ve been hooked!
I really love how easy it is to customize these wreaths with colors and prints just by choosing fabric! I’ve made one for the fall, one for the winter, and now this bright & colorful one for spring/summer.
Another thing I love about these fabric rag wreaths is that they are super easy to store when not in use. So many times I have bought pretty decorations for the door, only to find out the following year that they are missing a few pieces or things have come unglued.
With this wreath, it’s just a matter of shaking it out a little bit to fluff up the fabric and it’s ready to hang on the door!
Now this wreath is definitely not a one-hour, nap-time crafting, kind of project. However, it is the perfect project to work on while watching TV! This wreath kept me busy while watching the March Madness tournament and preseason baseball games.
How to Make a Fabric Rag Wreath
Supplies
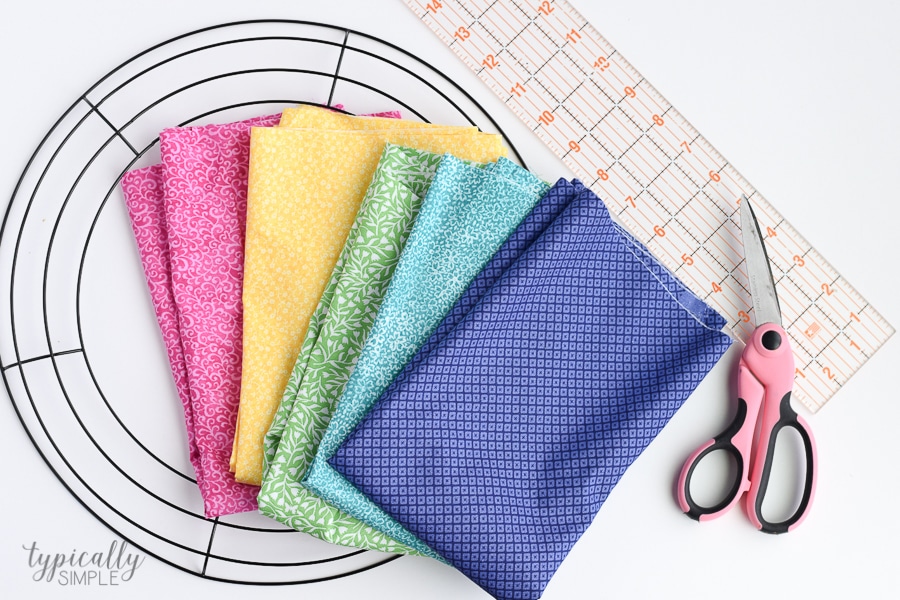
wire wreath form
about 2.5 yards of fabric total
scissors
ruler
Depending on the size of the wreath form, this project needs about 2.5 yards of fabric. This one was 14 inches and I decided to get .5 yards of each color. I had a little extra left, so if you use a 16in wreath form or larger, you might want to get just a little more fabric.
Directions
Start by folding your fabric in half, meeting the longer edges together. Using scissors, make cuts along the length of the fabric every inch or so.
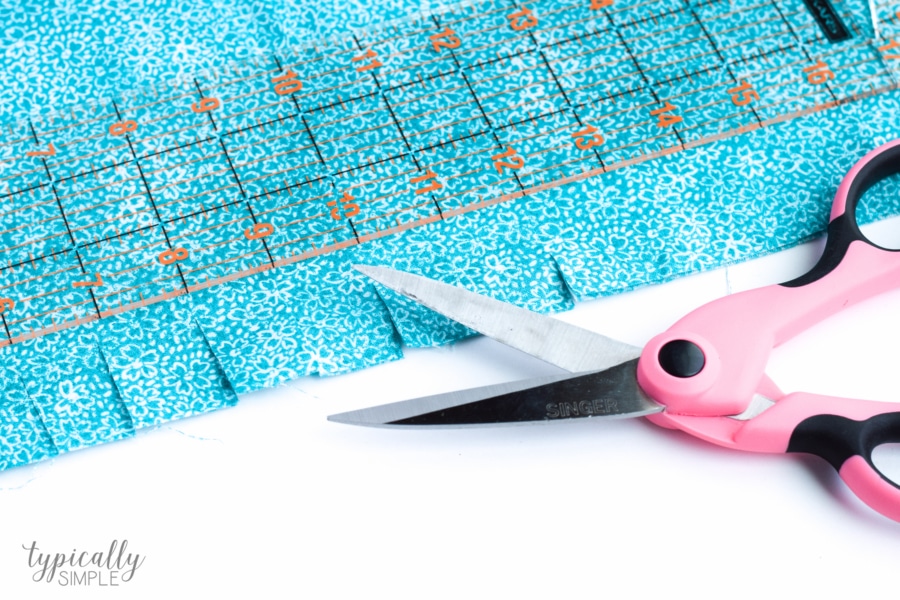
Unfold the fabric and rip into strips using the cuts as guidelines. There will be little threads from doing this – I like to pull them off as I go to clean up the fabric, but you can also leave them if you want a more scrappy rag look to your wreath.
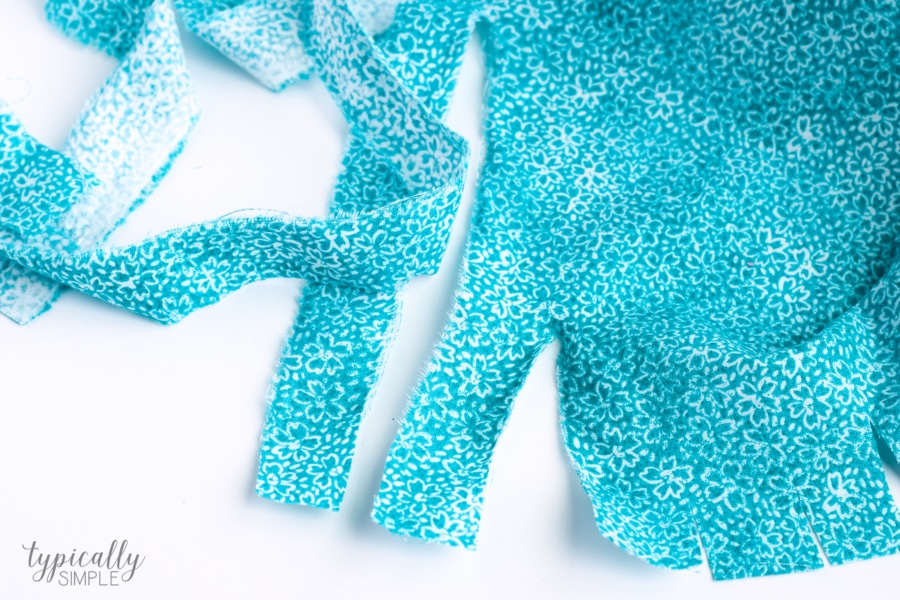
Now you will need to cut the strips in half to make them 9 inches long. I find it easiest to grab a few at a time, fold them in half and cut.
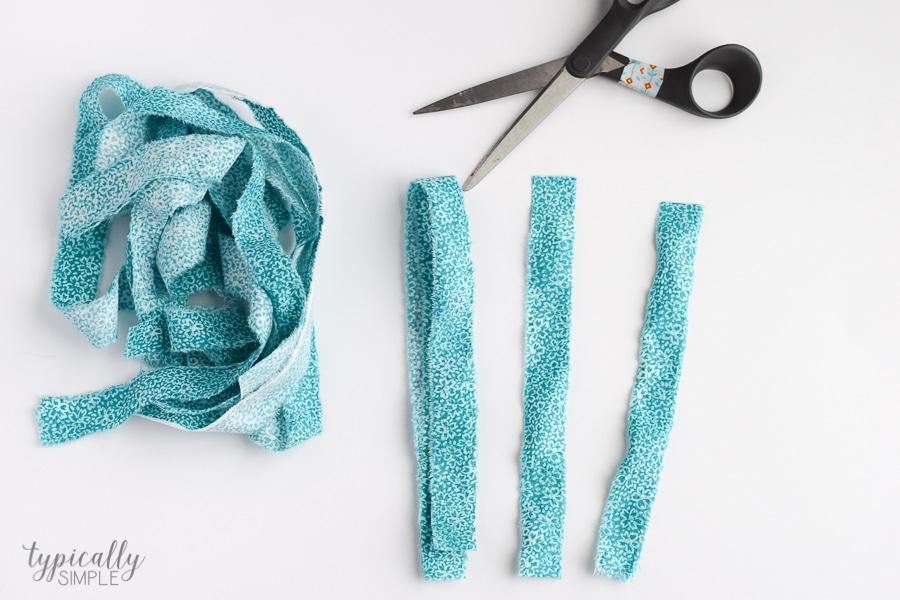
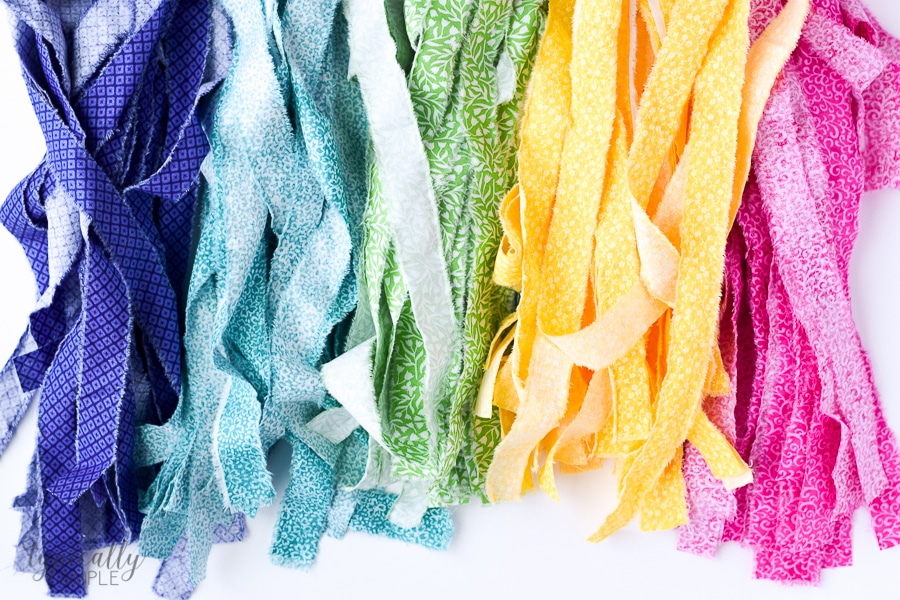
Then I sort all of the strips into piles based on colors and prints.
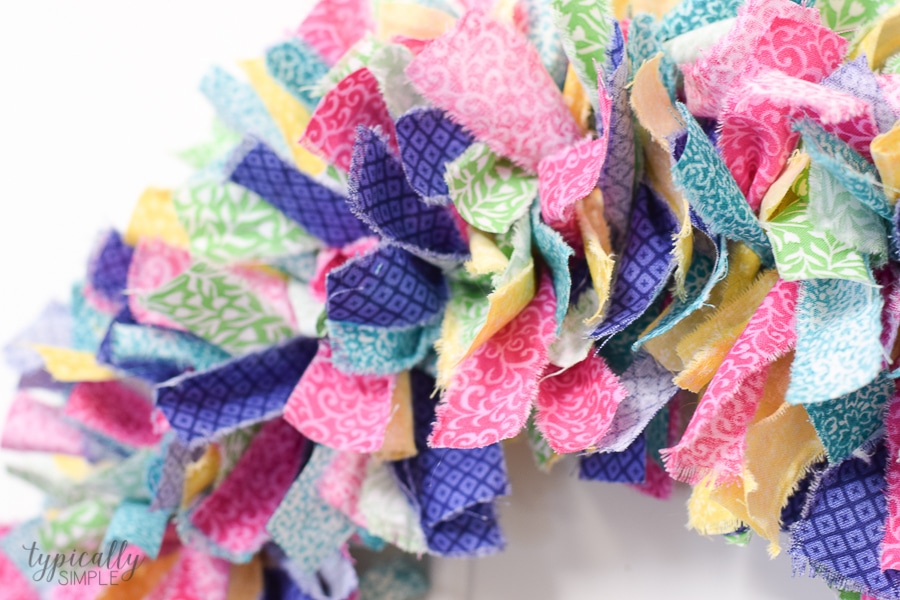
Now it’s time to start tying all of those fabric strips onto the wreath form! I like to create a pattern with my fabric, but you could also just tie them on any which color to make it more random. There’s no right or wrong way with this project!
Starting with either the outer most rings or inner rings, tie a piece of fabric in a knot around the two rings.

Then you will move on the the next two rings, and the next two, until you have three pieces of fabric tied onto the wreath form. Then start all over again.
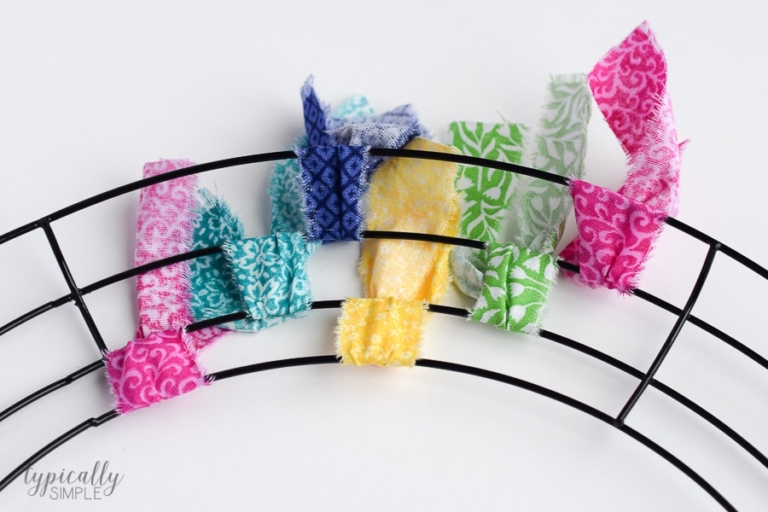
Keep continuing this tying pattern until the whole wreath is full. After I’m done, I like to go back and add in some pieces here and there to help make the wreath look even fuller. And then it’s ready to be hung up on the door!
Find out which link parties I’m sharing at this week!
Original article and pictures take typicallysimple.com site
Комментариев нет:
Отправить комментарий