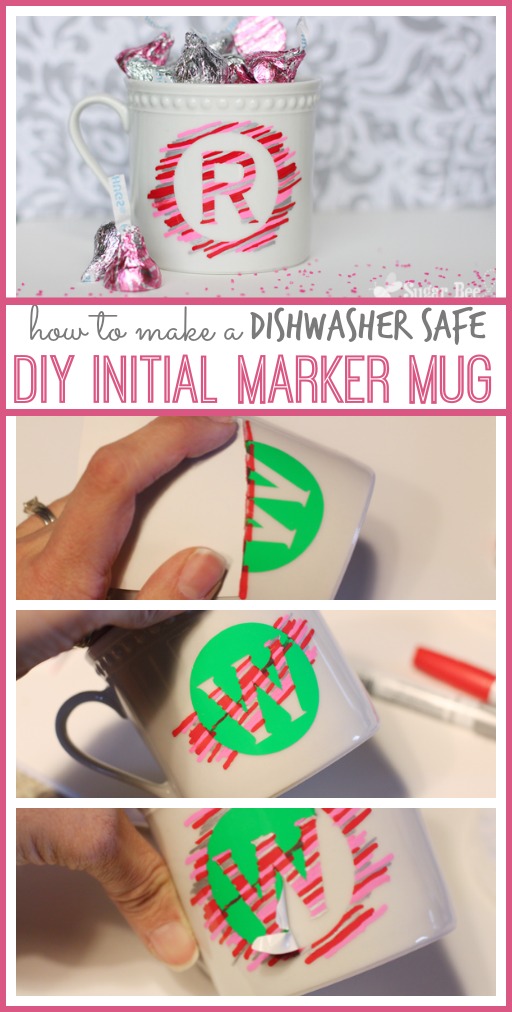
There’s just something about Valentine’s Day – – time to get crafty! I think it’s a slower time of year, and a fresh start to the year, etc. I am just more apt to craft now then say, during the chaos of November. Anyways, with Valentine Crafts on the mind, I’ve got an awesome one for you – – DIY Valentine Initial Mugs!!

Do you feel like this is a deja vu?? I actually made these last year and posted the tutorial as a contributor on the SNAP Creativity Blog – but I never posted the tutorial here and I don’t want you to miss out. Because it’s a great one.
These can be made for teacher or friend gifts, but I used them as gifts for my kiddos. What do you do for gifts for you kids for Valentine’s?? We don’t go too all-out, but we do give them a little treat, and I knew mugs would be the perfect way to present the gift.

This is actually the first time I’ve tried decorating a mug with marker – and I’m hooked! I even tested it for you and ran it through my dishwasher and it stayed on perfectly – a win!

First, gather your supplies – you’ll need:
-a mug (I grabbed mine at the thrift store)
-rubbing alcohol
-a stencil (I used my cutting machine, but you could easily punch a circle out of contact paper and cut the initial using an exacto knife)
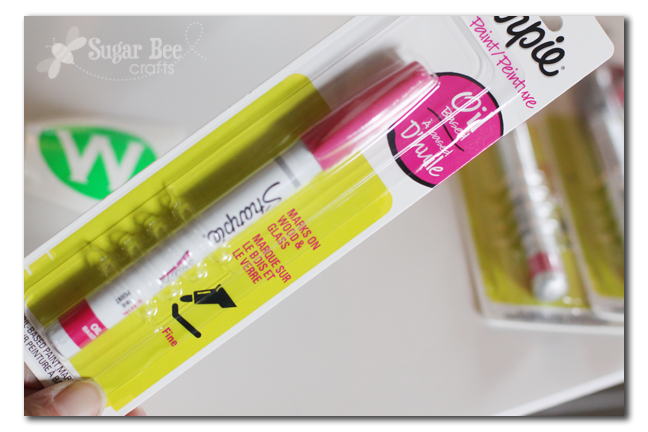
-markers in a few colors – oil-based sharpie


First up, the stripes. I thought the stripes would appeal more to my boys.

I placed the stencil on my cup and using a straight edge of paper, I drew one line near the middle of the design:

Then after that, I just started layering the lines above and below. Make sure to extend past the circle. I varied the pattern. I made some longer and some shorter. I made some thicker and some thinner. It’s fun to get creative!


The second technique I tried was dots – I thought my girls would love these ones. They’re so cute and fun!


So, to recap – – how to make a marker design dishwasher safe….
–prep mug with rubbing alcohol
–draw on design using Oil-Based sharpie
–let design “set” for a couple of days
–place mugs in cool oven. turn on oven and then bake at 375 degrees for 30 minutes. turn off oven and let the design slowly cool down inside the oven. let design “set” for the rest of that day
–wash in the dishwasher, top rack only
Original article and pictures take www.sugarbeecrafts.com site
Комментариев нет:
Отправить комментарий