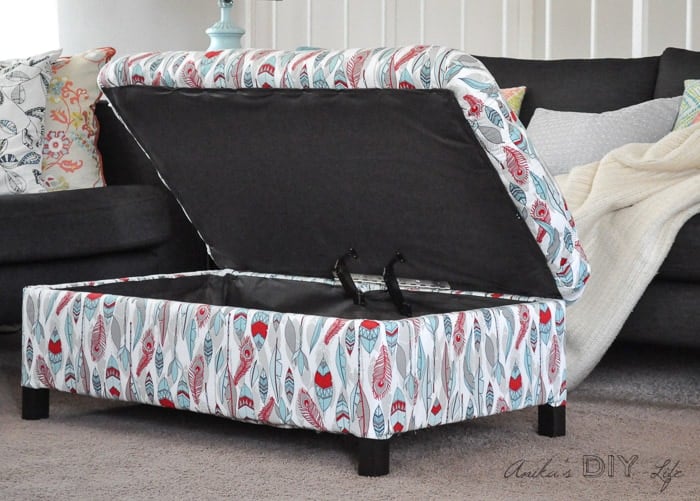
Make your own DIY upholstered storage ottoman with this step by step tutorial – from building the frame to upholstering it.
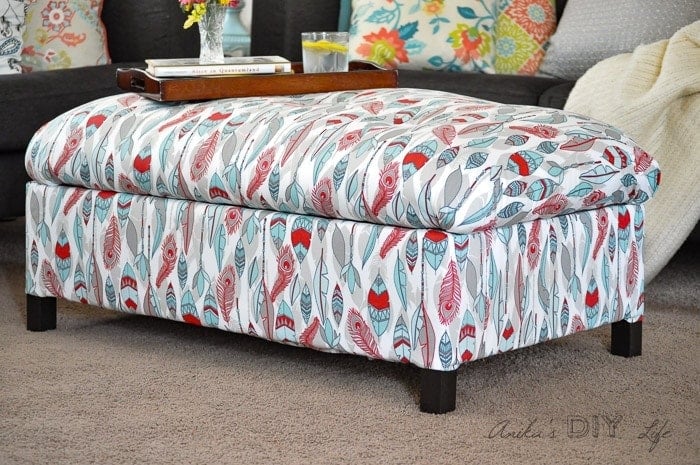
Our family room/living room needed an ottoman – a storage ottoman to precise. I have been looking for it in stores and online and even did this post about all the ones I was looking at but didn’t find anything that fit all my requirements of size, functionality, and cuteness. So, what is this girl going to do – she is going to make her own! And I am really happy to report that it turned out exactly like I wanted!
Let me give you a quick history on our living room. A couple of years ago we got rid of our coffee table. It was glass and metal and pretty much a hazard for babies and toddlers. We got an Ikea Lack coffee table to go with our new Ikea Karlstad couch to temporarily serve the purpose but we missed putting our feet up. As a quick solution and inspired by tutorials on the web, I created the upholstered version of the Ikea coffee table. That was about 2 years ago. There are many things that were still not working out – not to mention that I was a novice “upholsterer” and the “ottoman” doesn’t look too great – also 2 years later, the Fabric needed to be changed anyway! Having storage was really important too so we could store our throws, magazines, and games for family game night in there.

Materials needed for DIY upholstered storage ottoman –
The size of my ottoman is 36″ x 22″ and approximately 14.5″ high. The ottoman is made in two major steps – building the frame and then upholstering it.
You can get printable plans for this DIY Upholstered Ottoman in my Library of Free Plans!
***This post contains affiliate or referral links. It is a way for this site to earn advertising fees by advertising or linking to certain products and/or services. Please read my full disclosure here ***
Materials needed for building frame –
- 2″ x 2″ x 4′ board – cut to 10.5″ (total 4) – to make the legs.
- 1″ x 8″ x 12′ board – cut to 32″ (total 2) and 19″ (total 2) – to make the sides of the ottoman.
- 3/4″ plywood – 36″ x 22″ – for the top.
- 1/4″ plywood or hardboard – for the bottom of the storage frame.
- Center mount toy box lid support (total 2)

Materials needed for upholstering the frame –
- Batting
- 3/4″ Foam (I used remnant from a foam mattress topper)
- poly fill (I re-used filling from old pillows)
- 2.5 yds Fabric of choice for outside – I used this fabric.
- 2 yds Fabric to line the inside and bottom (I don’t know what it is called but the lady at Joann called it the sofa liner fabric. It is super cheap at $2.99/yd)
- Staple gun and staples
- Thick upholstery thread
- Fabric covered button kit.
How to build DIY upholstered storage ottoman –
Part 1 – Build the Frame
Step 1 – Start by building the 19″ sides and legs. Use the Kreg jig to make pocket holes and use 1 1/4″ pocket hole screws. You can also use countersunk wood screws from the sides if you do not have a kreg jig.

Step 2 – Attach the long side aprons and create a box.
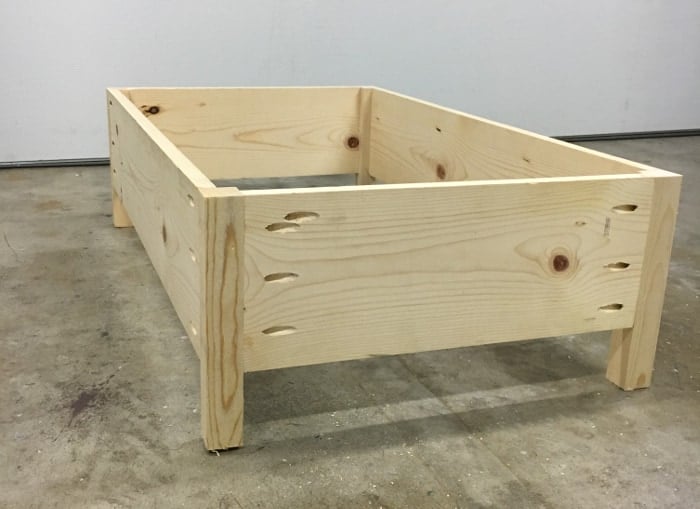
Step 3 – Attach the 1/4″ bottom for the storage frame using wood glue and nails. Also cut out the 3/4″ top and make sure everything fits. Drill holes in the top plywood if you will be tufting. I made 5 holes.

Step 4 – Paint the legs to match your other furniture. I had painted the legs of my Karlstad couches with Oil rubbed bronze spray paint. So, I painted the legs of this ottoman to match that!

That’s it! We are not ready for the upholstering!
How to upholster the DIY storage ottoman –
Step 1 – Wrap the frame in batting. Staple the batting around the frame. Follow that with the outer fabric. Where the fabric ends, I just created an overlap and folded in the raw edge of the fabric. I glued that raw edge using fabric glue. Its hard to even see the seam.
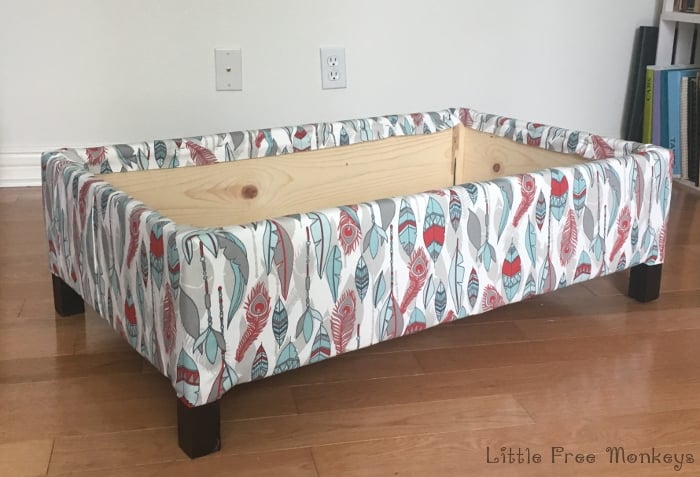
Step 2 – Now cut the inner lining fabric to size – making allowance for the sidewalls and some extra to fold in. spray the inside of the frame with spray adhesive.

Step 3 – Smooth the liner fabric along the inner storage box. On the corners, I folded the extra fabric inside, like we do in a gift wrap.

Step 4 – Fold in the raw edge of the liner fabric and staple along the edges. Our bottom storage box is ready.

Step 5 – Time to upholster the top! Lay the foam on the top plywood. The foam should be cut about 1/4″ larger than the plywood. Lay polyfill on top of the foam – in my case it was filling from old pillows (don’t worry – I washed them before hand). Last, wrap it with batting and staple on the bottom.

Step 6 – Cover the top in the outer fabric and staple it to one of the long sides.
Step 7 – Time to tuft. First, put together the fabric covered buttons per directions on the package. To tuft, I pretty much followed this awesome tutorial on how to do this. Once the tufting is done, staple the fabric all around the top.

Step 7 – Cover the back of the top using the liner material. I did a double layer since a single layer was not opaque enough. Fold in the raw edge and staple it to the sides.

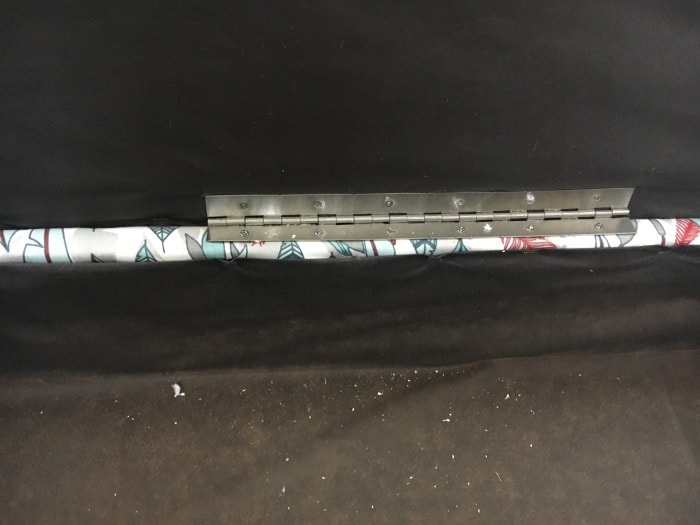
Step 8 – Attach the top to the storage frame using the piano hinge.
Step 9 – Attach the toy box lid support hinges. Ideally, you should attach these on the either side of the piano hinge. I started with attaching one in the middle but it was not enough to hold the weight, so I added another one next to it.

And we are done! It was a little bit of a long process but totally worth it! It is exactly what I was looking for. I am in love with the fabric pattern. It brings much needed pattern and color to the living room.

And it has the perfect amount of storage too!
Remember! You can get the printable instructions and plans for this and many more projects in my Library of Free Plans!

What do you think? Are you thinking of doing a DIY upholstered storage ottoman?


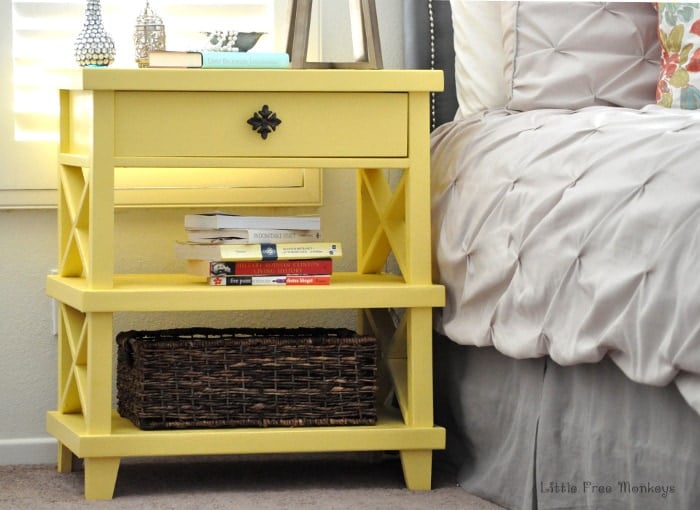
I love making furniture! Check out my Pottery Barn inspired nightstand –
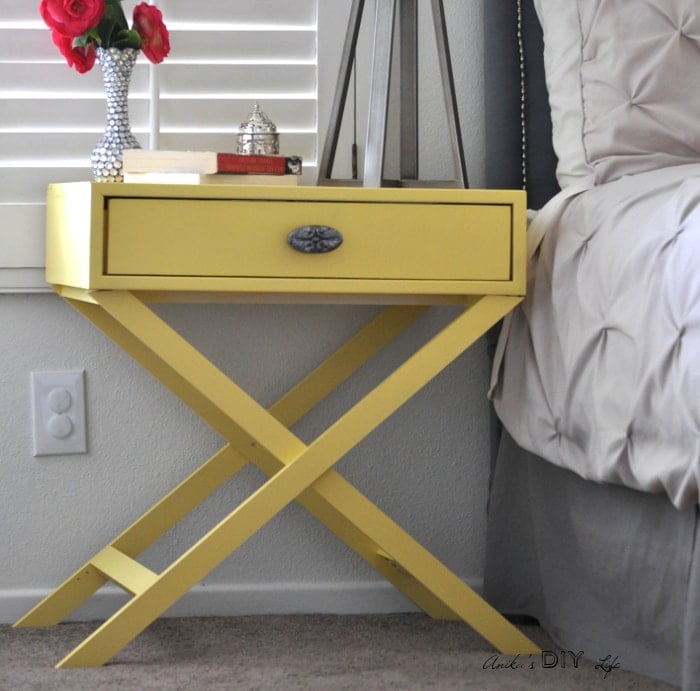
And my x-base accent table or nightstand –
But I think one of my favorite builds is this mirrored console table!

You might also enjoy these articles on storage ottomans –
Original article and pictures take www.anikasdiylife.com site
Комментариев нет:
Отправить комментарий