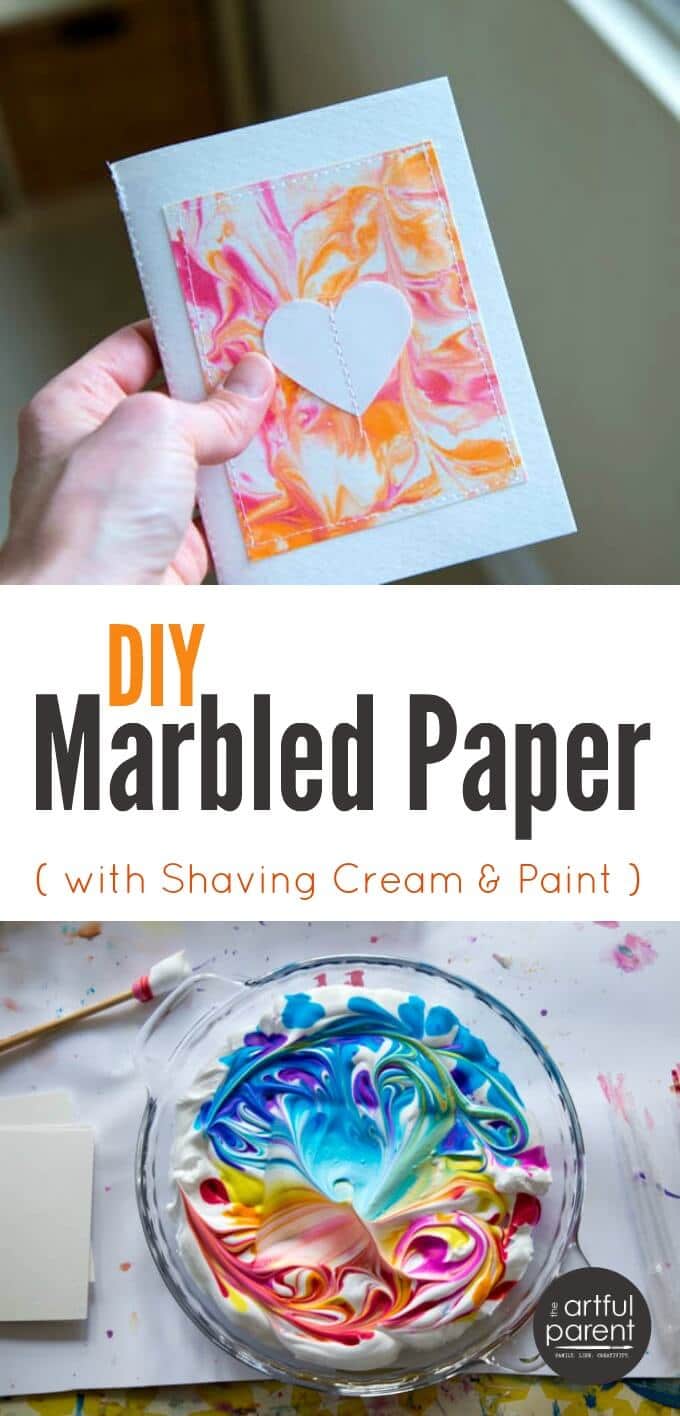
This marbling technique is one of our all-time favorite art activities. Like raised salt painting and splatter painting—the other faves I mentioned the other day—it’s one that that the kids never tire of and that we’ve returned to again and again over the years.
Today, I’ll share the step-by-step instructions for doing the shaving cream marbling, then tomorrow or the next day, I’ll share how we used the beautiful marbled paper to make our own valentine cards, notebooks, and garlands.
First, here’s video I made showing the shaving cream marbling in progress.
(And here are the step-by-step instructions and photos…)
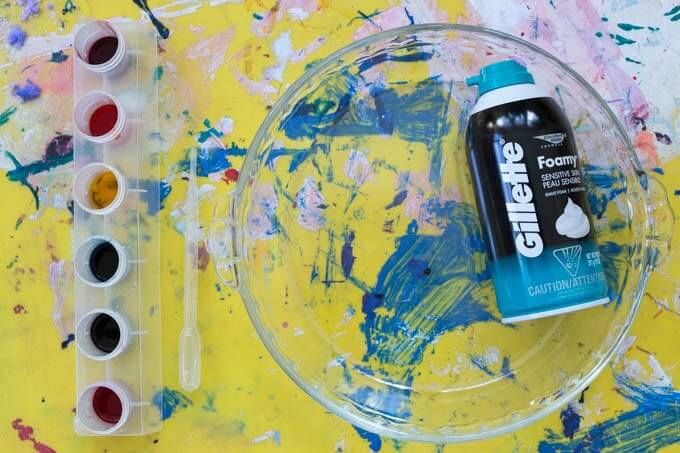
Stir stick, such as a chopstick or the bottom of a paint brush
Card stock (or poster board cut into smaller pieces)**
A scraper, such as a square piece of cardboard
*I say “shaving cream” marbling, but you’ll want to buy shaving FOAM, not cream. I like to use a low-smell, sensitive skin variety such as those made by Gillette or Barbasol.
**While you’d think watercolor paper would be best for this since it involves watercolor paint, you’ll actually get better results with a very smooth surface rather than the toothed surface that watercolor papers have. Use card stock if you have it or buy a sheet of white poster board and cut it down into small pieces as I did.
DIY Marbled Paper Step-by-Step Instructions
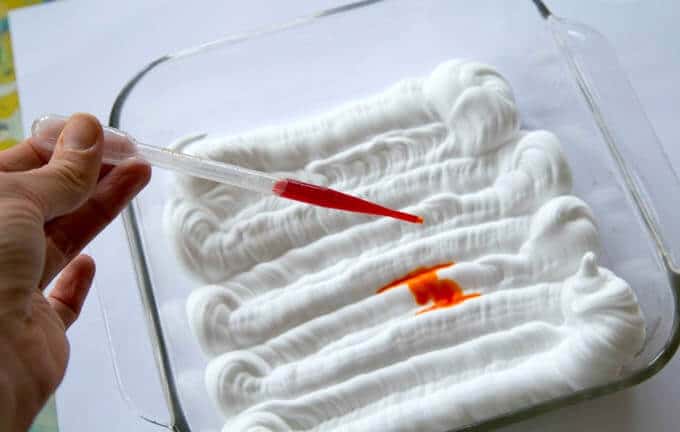
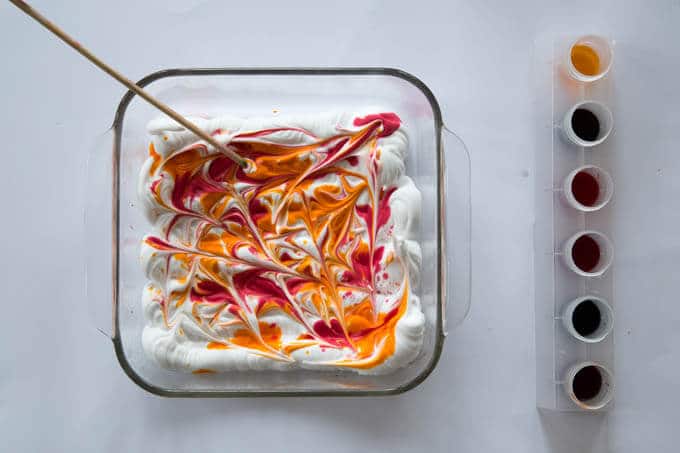
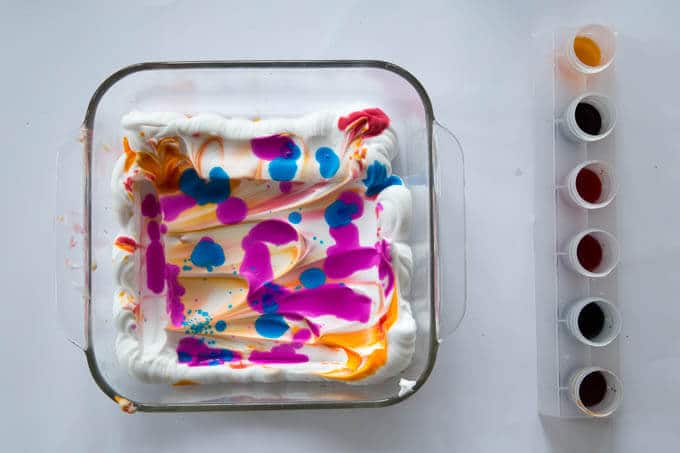
First, spray a layer of shaving cream to cover the bottom of your baking dish.
Note :: If you don’t have liquid watercolors, you can use watered-down food coloring. You can even do this project with other paints, such as tempera or liquid/craft acrylics, although the results will look a bit different.
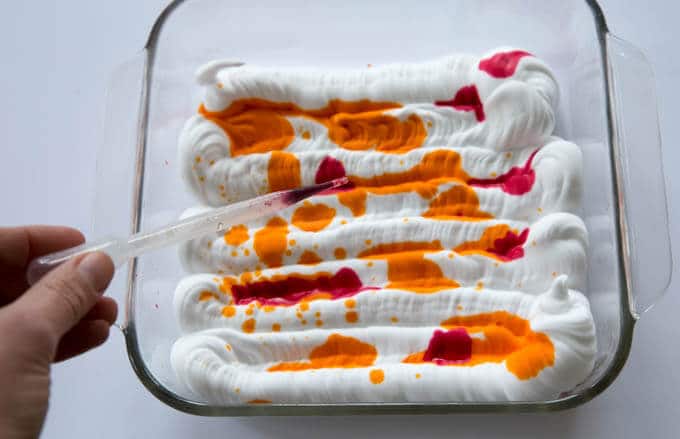
Add more colors…
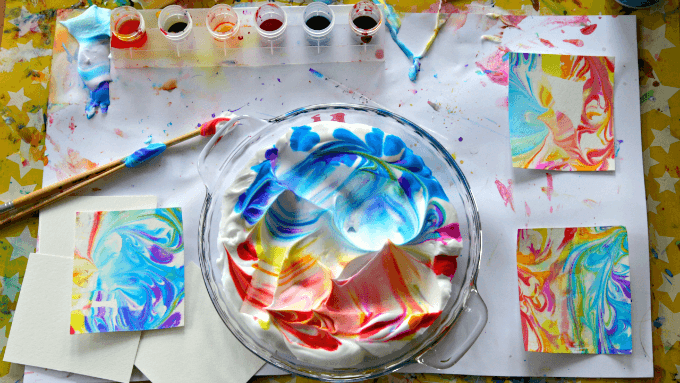
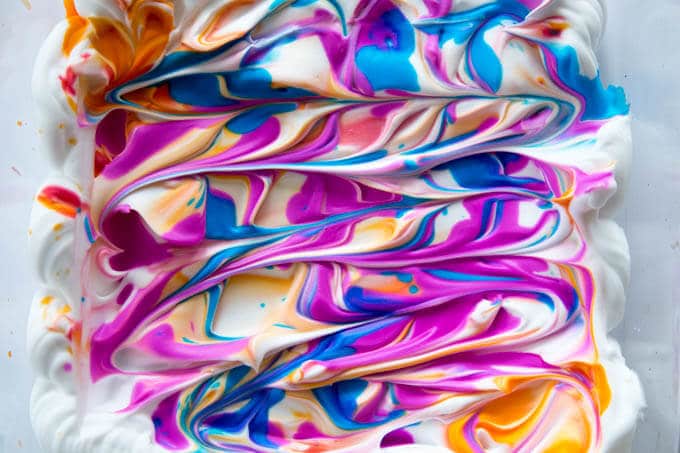
Next, use a stick (a chopstick, the end of a paint brush, or even the dropper) to swirl the paint around for a marbled effect.
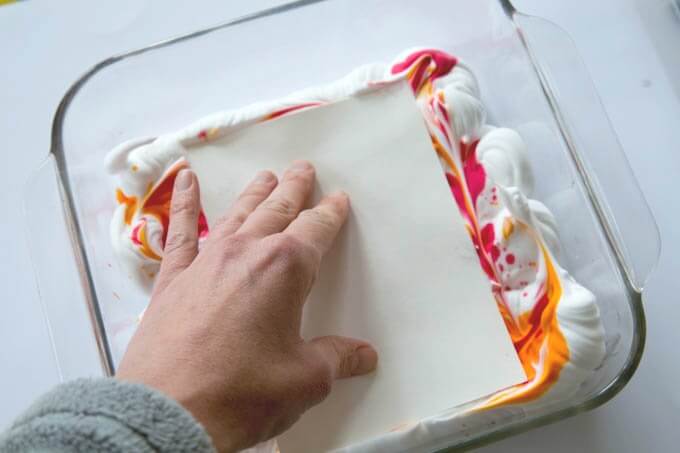
Press a piece of card stock into the paint covered shaving cream.
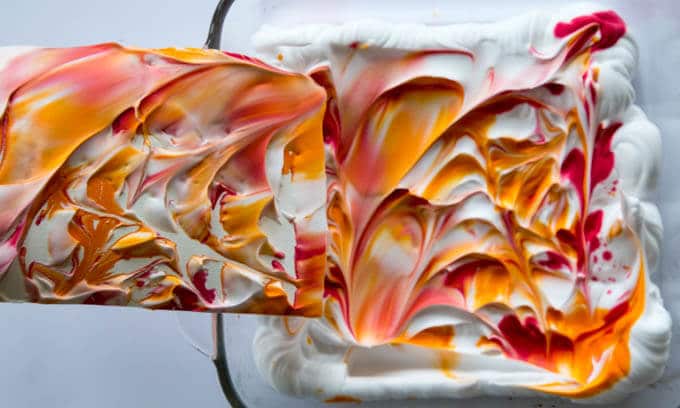
Lift up the card stock…
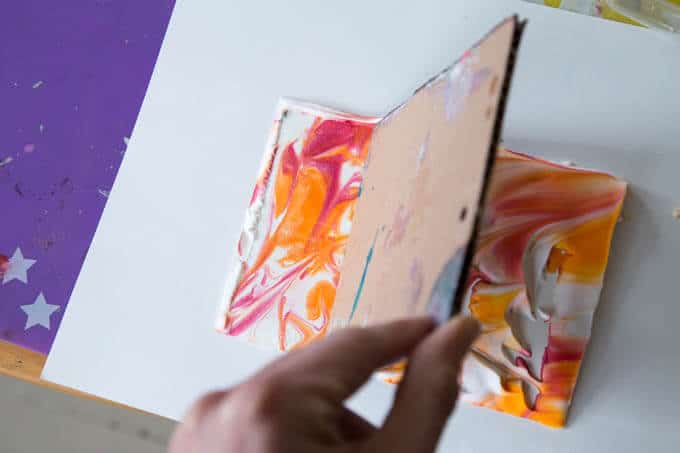
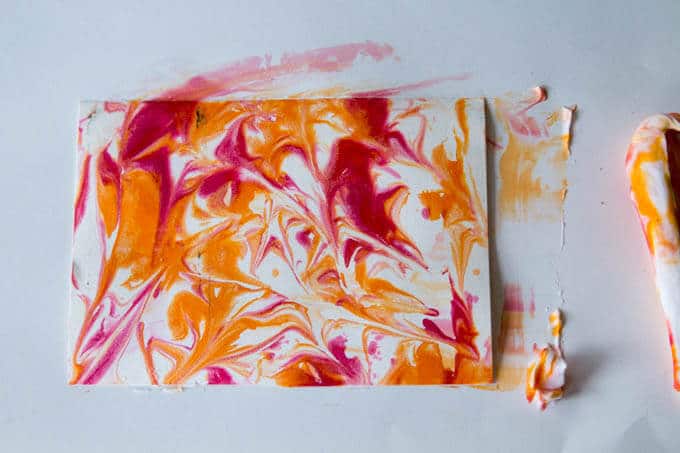
…then use a piece of cardboard to scrape off the shaving cream.
This reveals your beautiful new marbled paper!
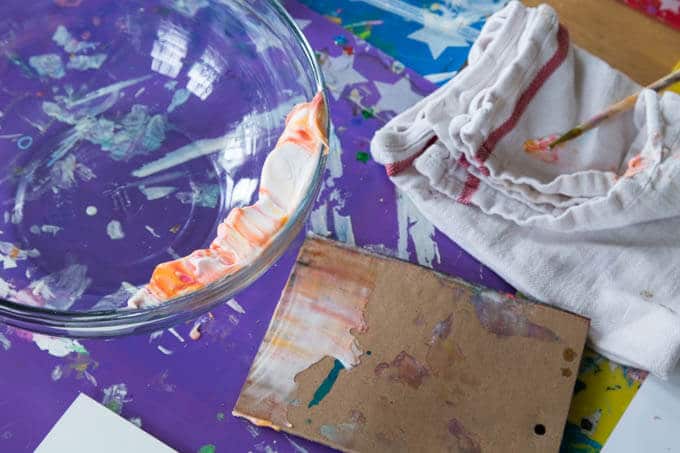
Note :: We like to keep a bowl in the center of the table while we’re working. The shaving cream we scrape off of the newly marbled paper, gets re-scraped into the bowl. And later, when we’re finished with the activity, we use a rubber spatula to scrape the paint-y shaving cream into the trash before washing out the bowls and dishes.
You’ll get a couple of good marbled papers from the paint, then want to add more drops of liquid watercolor…
…and swirl it around…
…to make another couple of marbled papers.
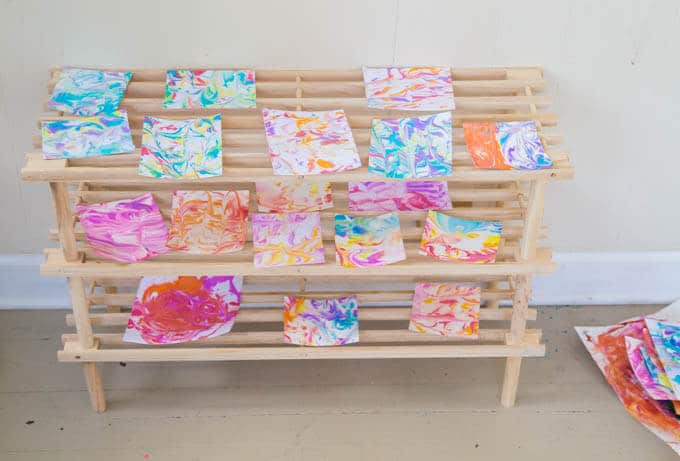
Let them all dry. (Yes, this is a shoe rack. It works great for drying art!)
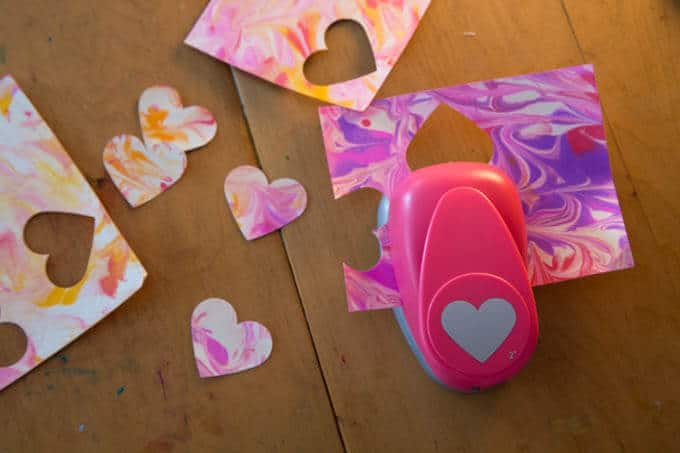
Tomorrow (or the next day), I’ll share all the different things we’ve been making for Valentine’s Day with our new DIY marbled paper. (Heads up :: We’ve been punching out 2 inch paper hearts from our marbled paper with a heart punch like this one.)
Pin It for Later
Original article and pictures take artfulparent.com site


Комментариев нет:
Отправить комментарий