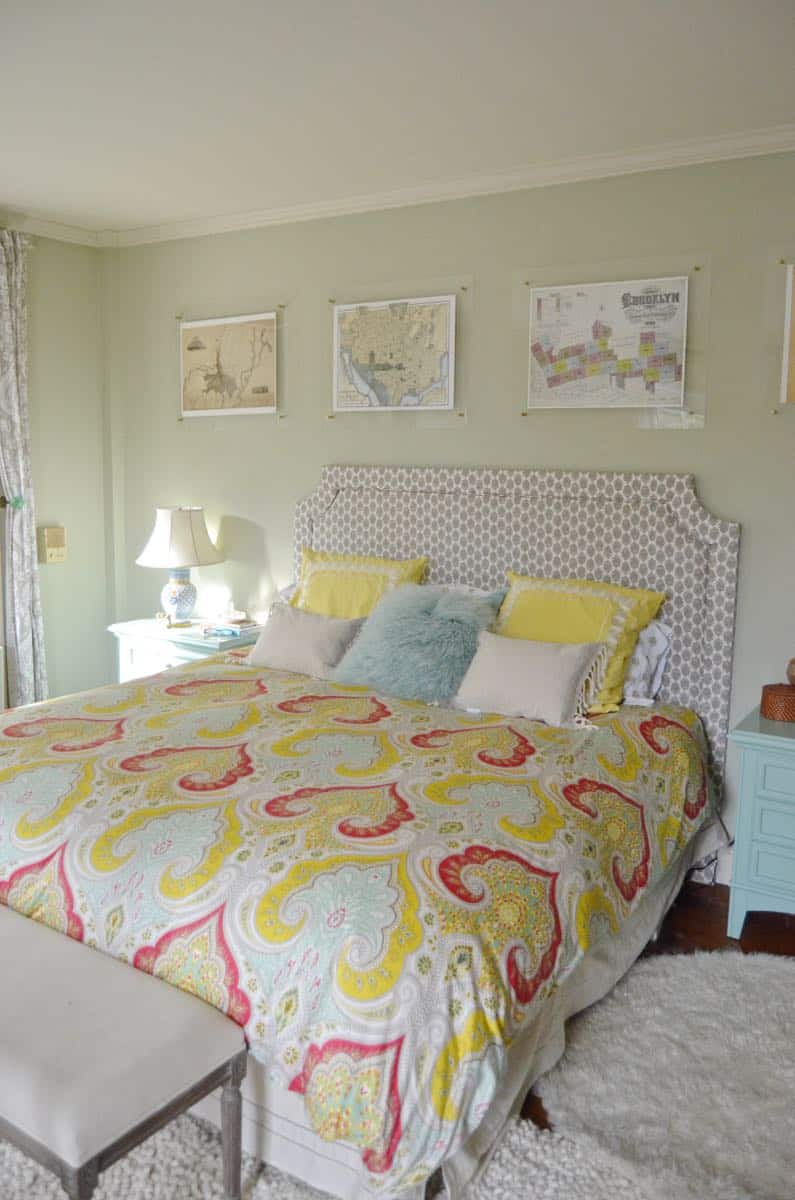
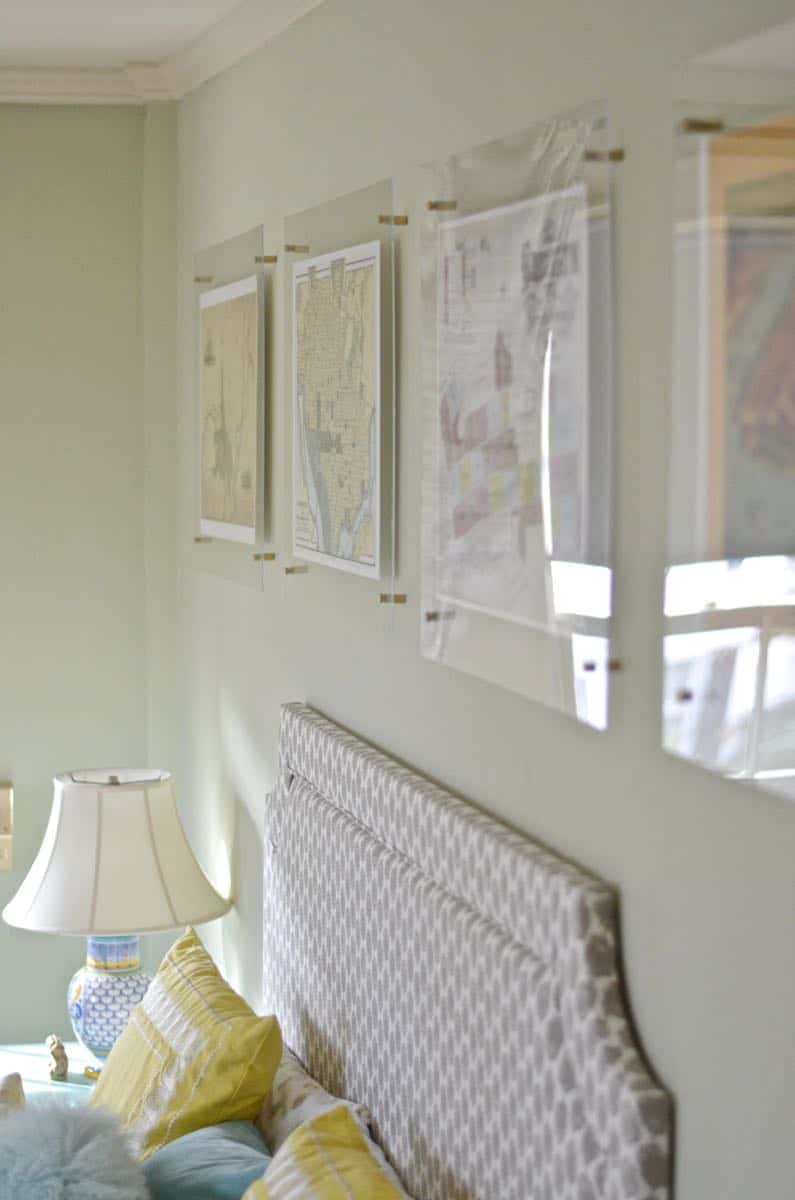
For a while now, I’ve been holding off on posting about our master bedroom because of two things: the curtains are too short so I need to sew a strip on the bottom of each one and… I didn’t know what to do with the wall above the bed. I’m still dragging my feet with the curtains (sewing’s haaaarrrrdddd), but… I worship the new-and-improved wall over the bed. I found those amazing vintage maps online at Cartographer’s Union.
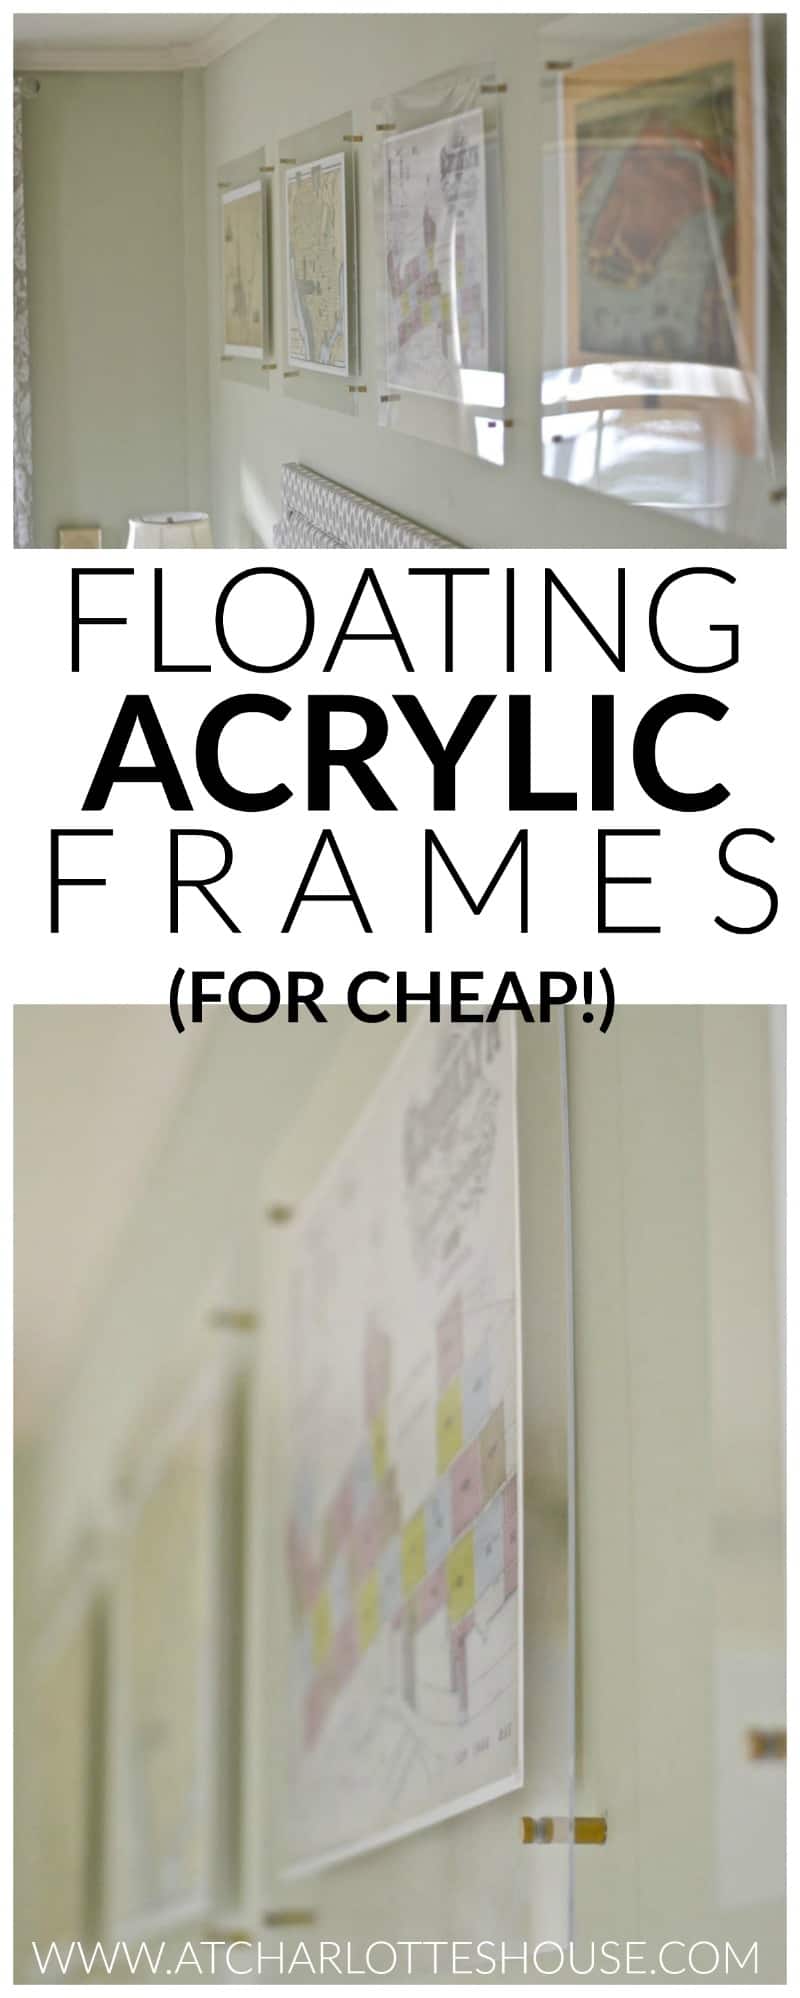
Floating Acrylic Frames on the Cheap
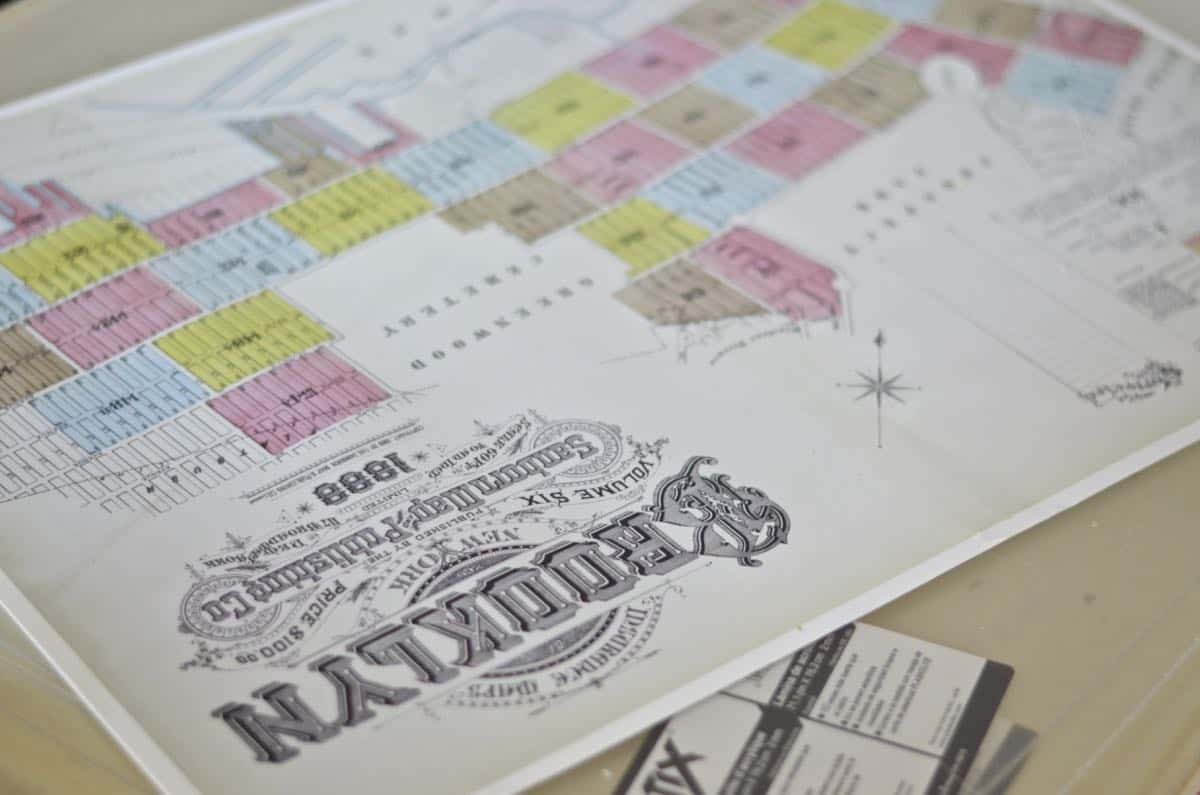
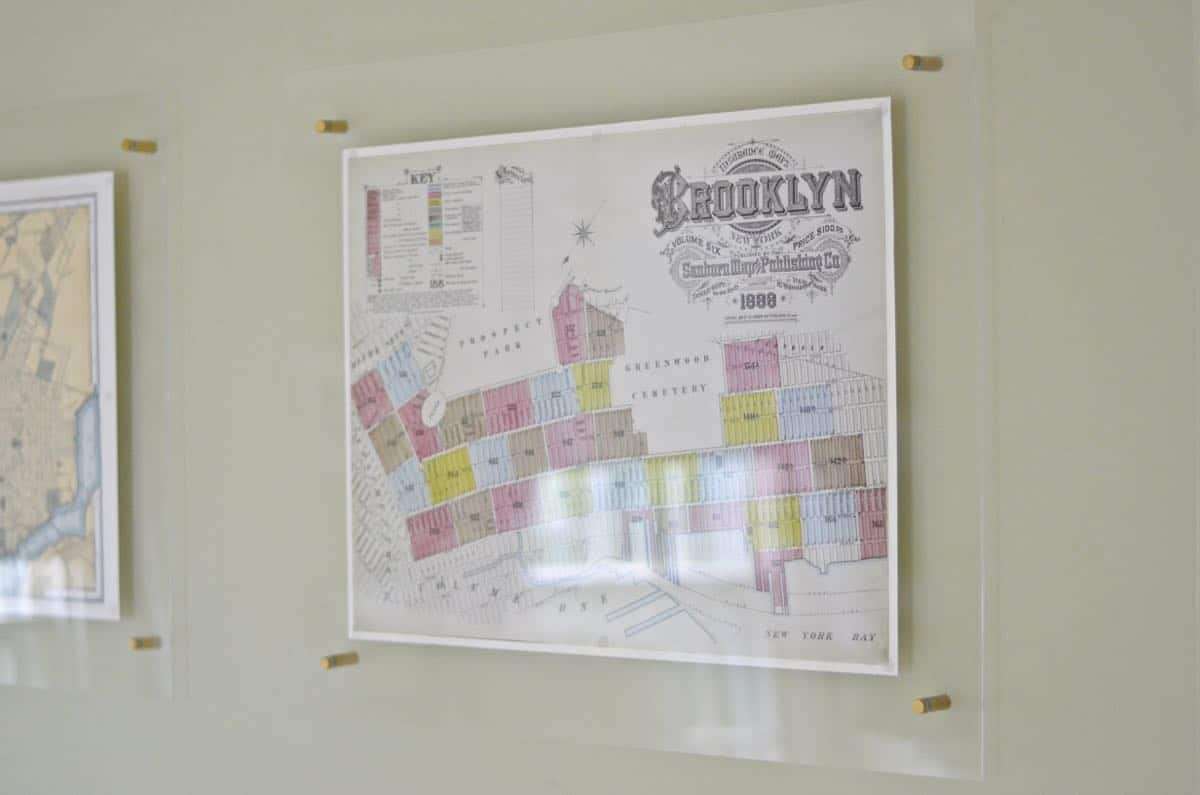
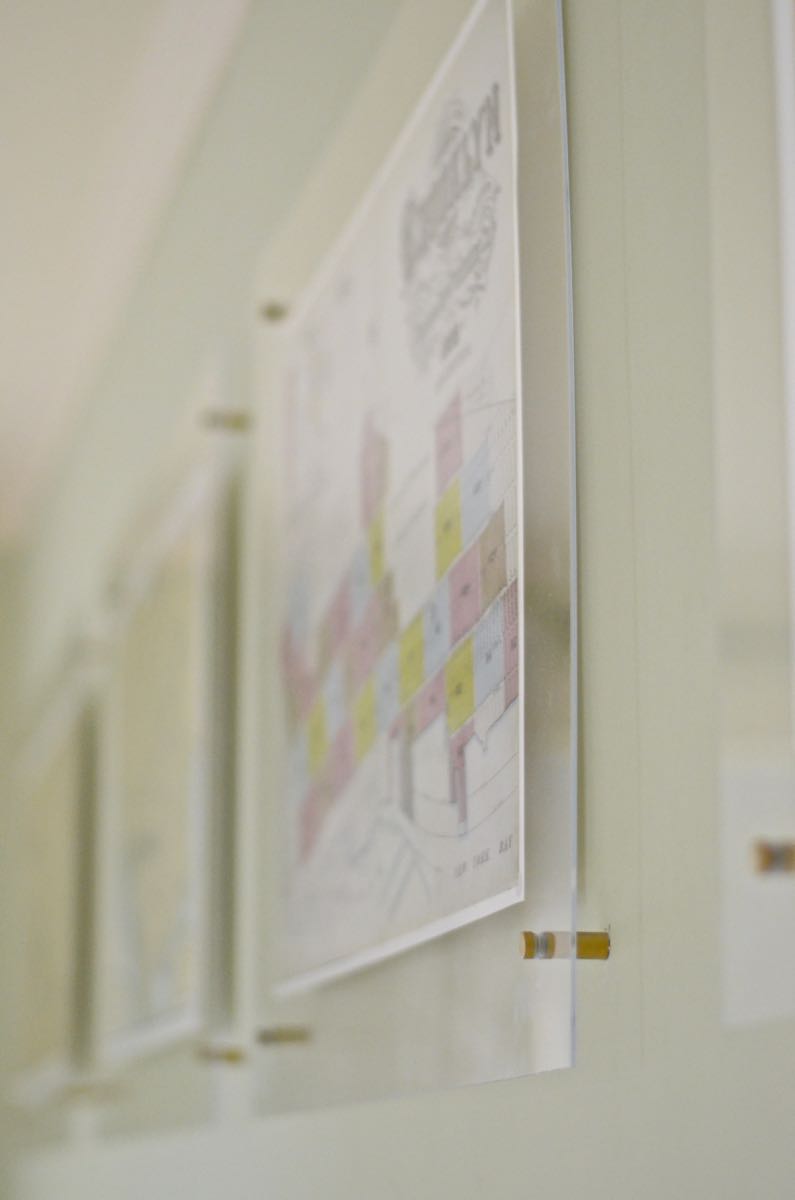
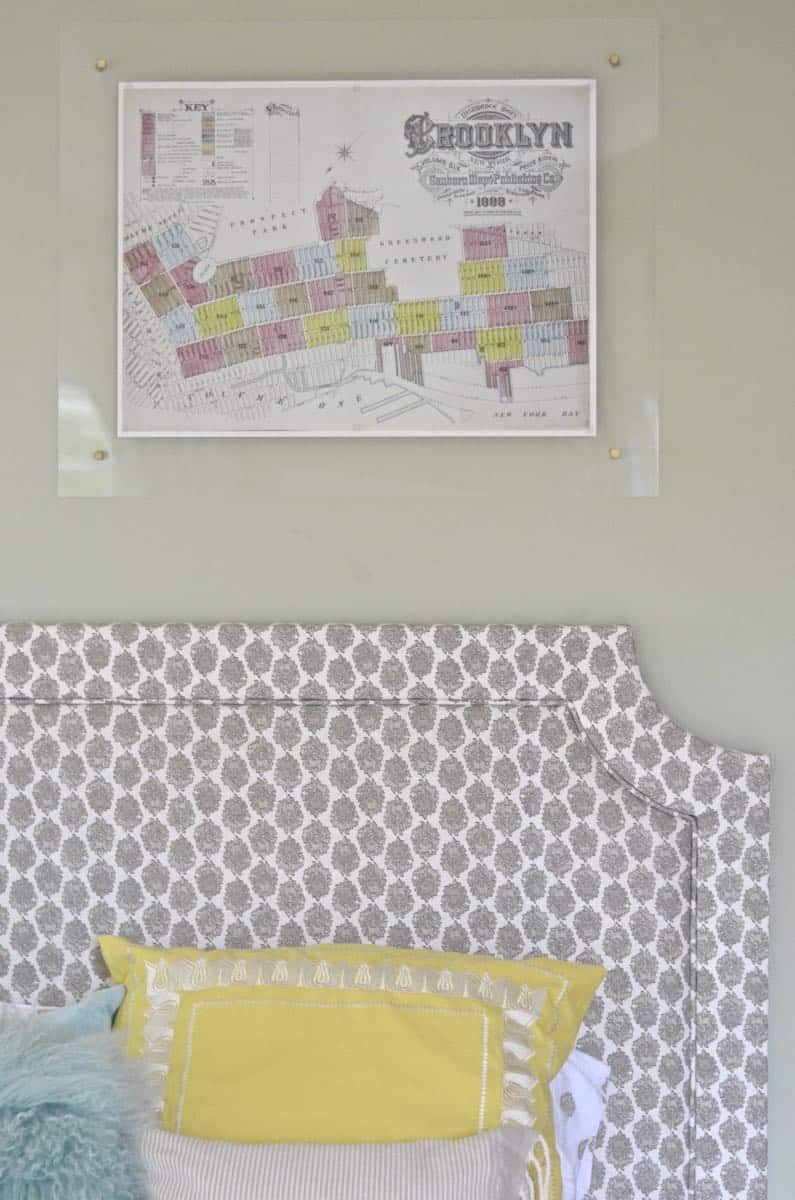
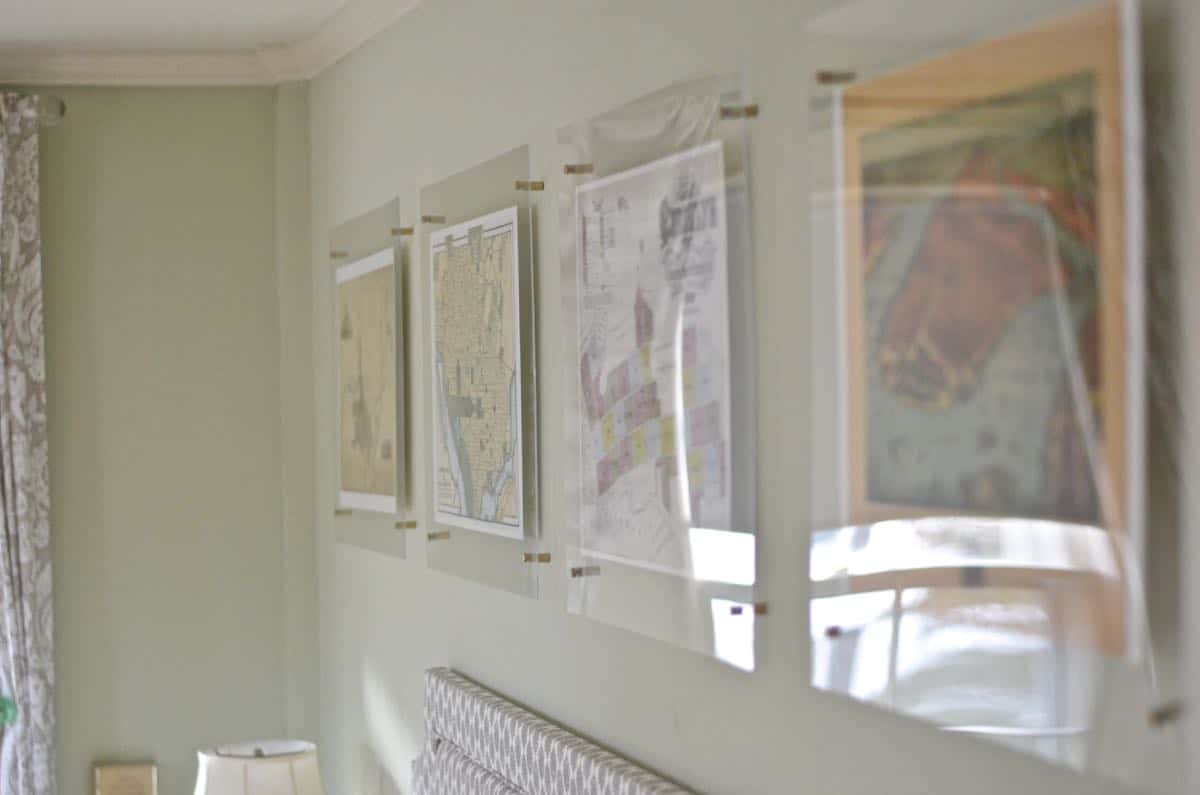
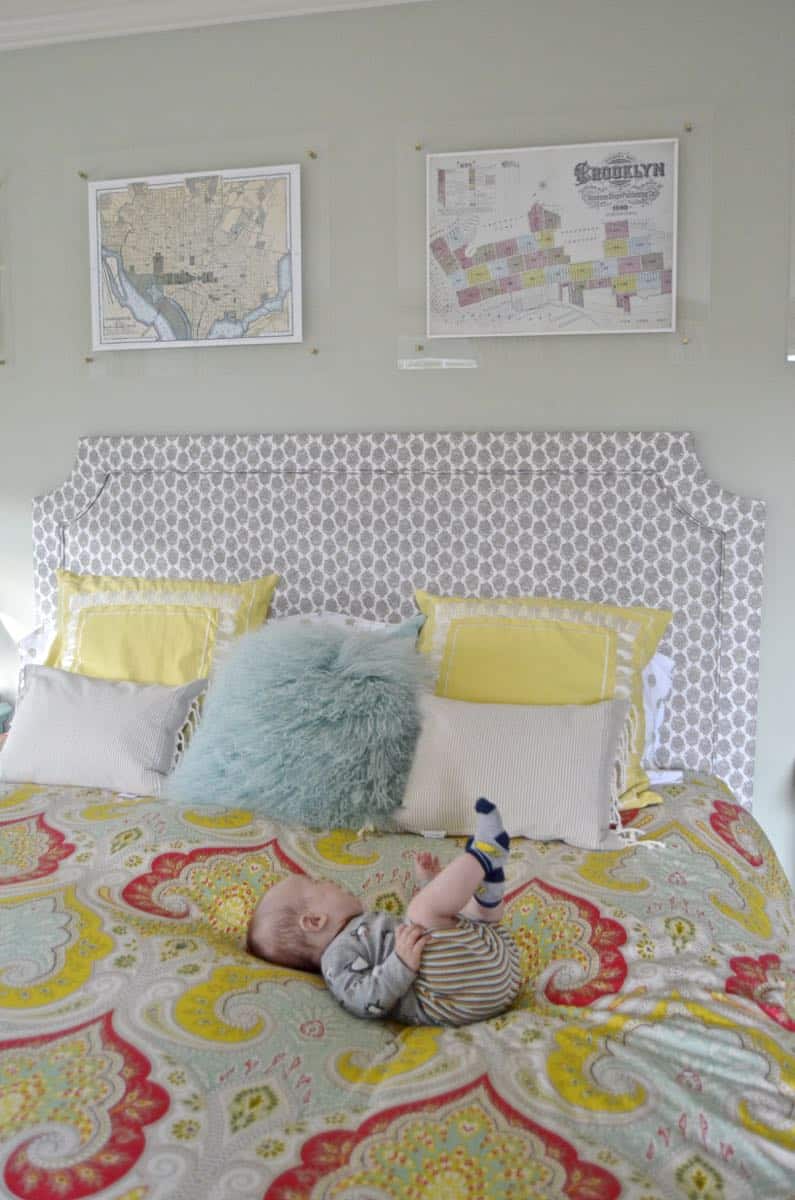
I was sent four maps for the master bedroom: Washington, Providence, Brooklyn, and New York… four cities of importance to us! I didn’t want a solid frame to take away from the beauty of these maps so… I decided to take another stab at floating acrylic frames. On a budget.
Materials for Floating Frame
(affiliate links included for your convenience):
- optional: gold spray paint
- long #6 screws and anchors if necessary
- you’ll need a narrow and long drill bit to fit inside your standoff mount. I used this one from Home Depot
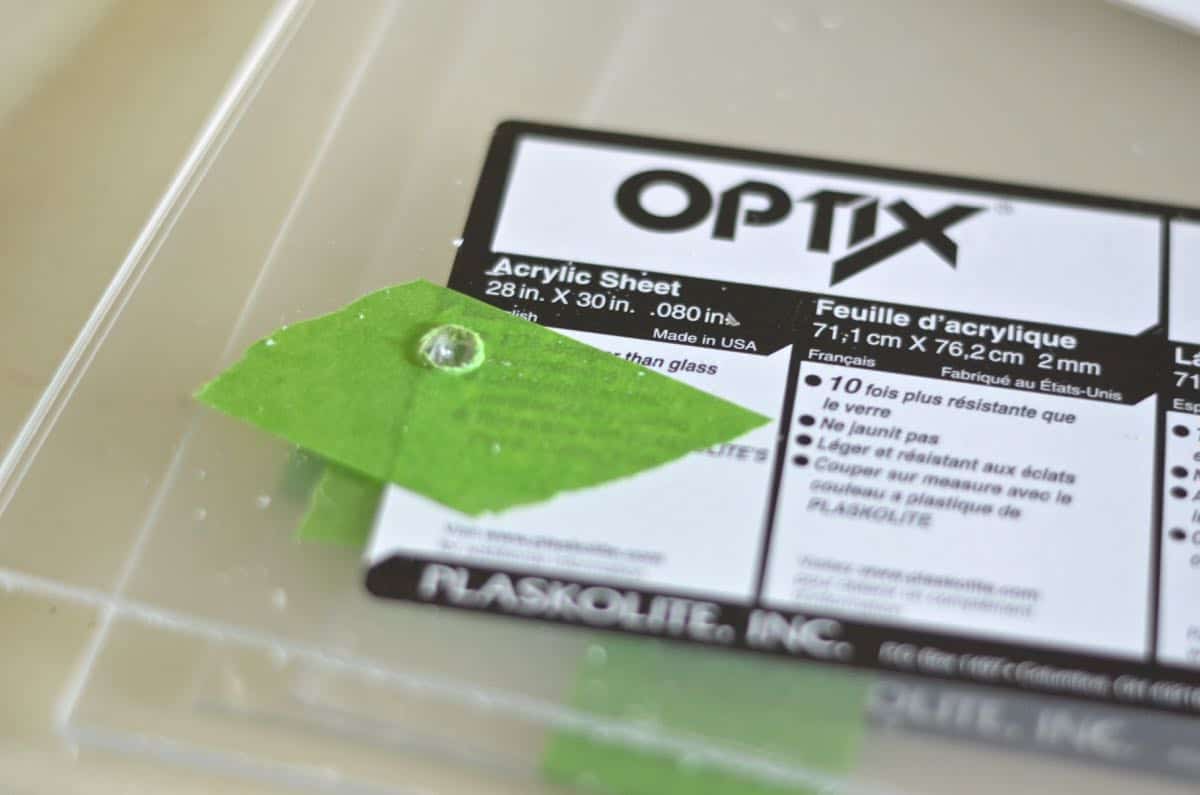
- Acrylic. Lowes will cut acrylic for you… I added 3 inches to each dimension so these 18 x 24 inch maps meant my acrylic was cut to 24 x 30. To cut costs, I used 4 sheets of acrylic and glued the artwork directly onto each sheet… obviously it will be a bit nicer to use one sheet of acrylic on either side of the artwork, but it will add another $50+ to the cost of this project.
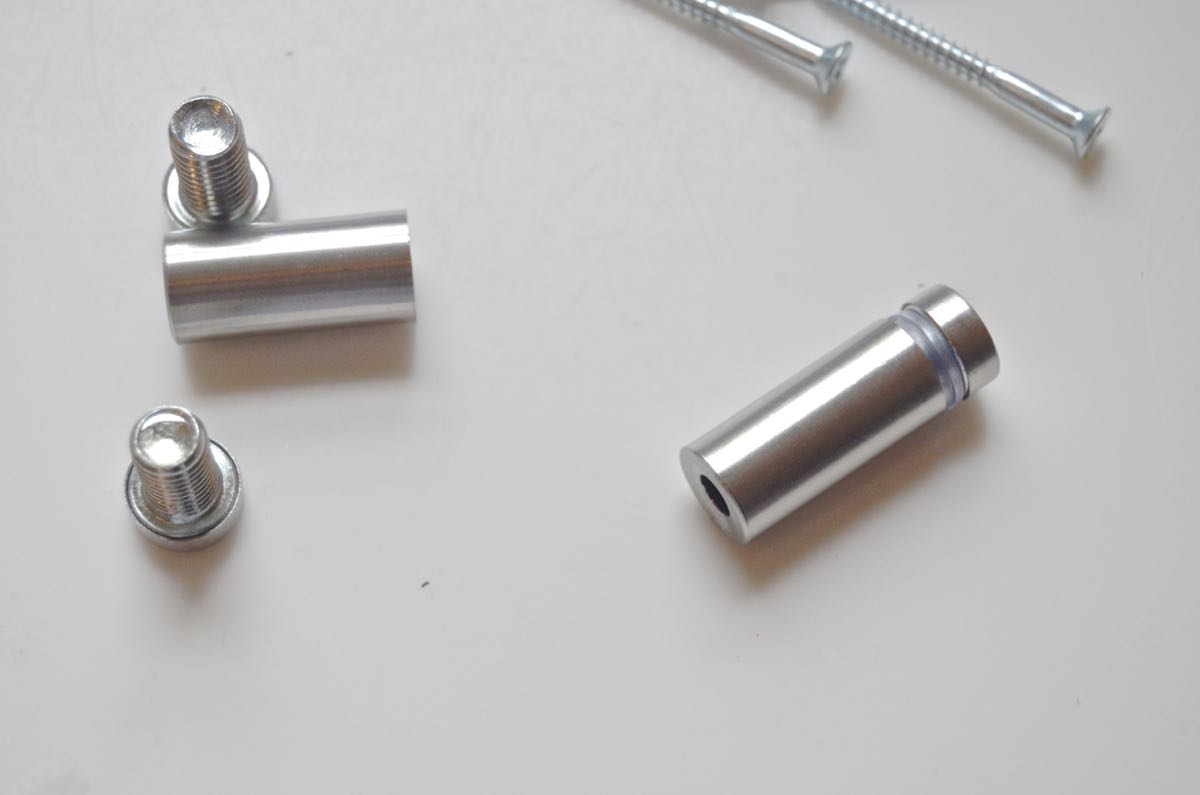
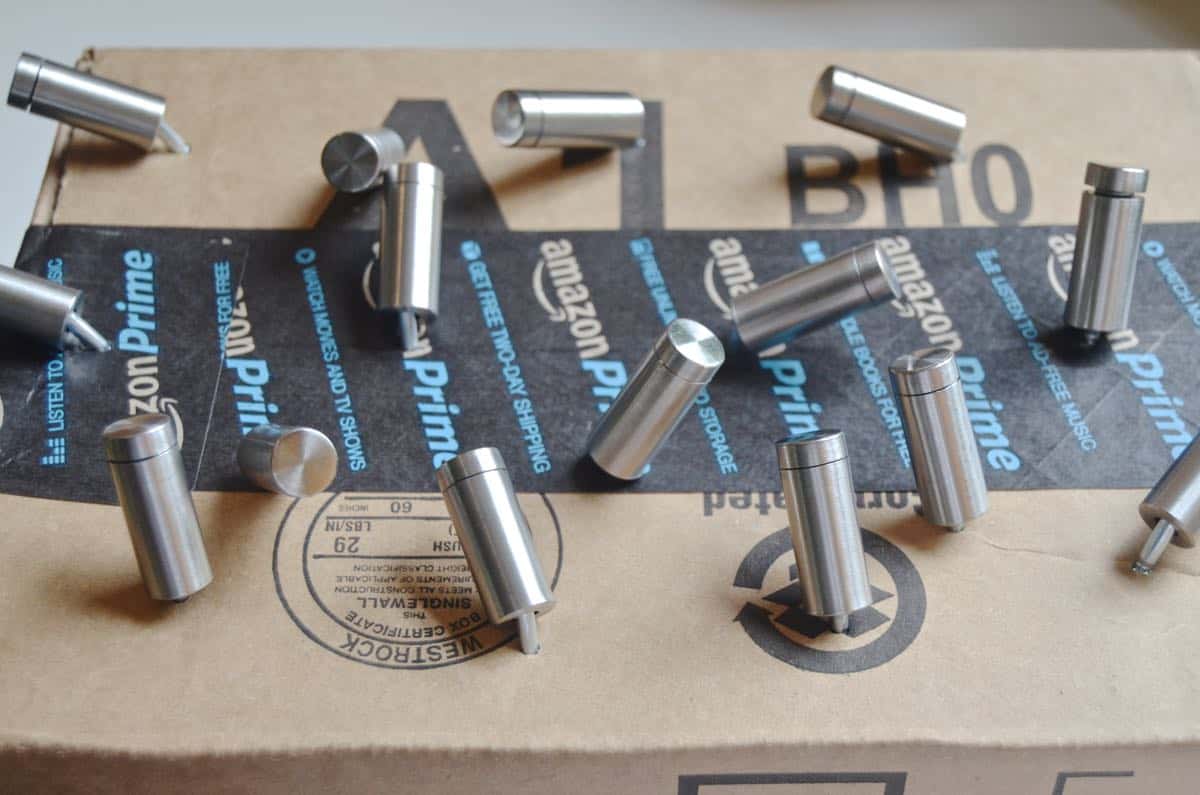
Step 1: Spray Paint Mounting Hardware
Spray paint your mounting hardware if you want it gold. (I mean… who doesn’t want it gold, right?!)
Tip: stick standoff mounts into an old cardboard box for easy spraying
Step 2. Drill Holes in Acrylic
Drill holes in your acrylic at each corner. To drill through acrylic, use painters tape on each side of the acrylic to keep it from cracking. On a flat surface with a thin piece of wood or cardboard underneath, slowly apply increasing pressure to drill all the way through your acrylic. (Make sure you leave the protective sheet on the entire time… take it off just before hanging.)
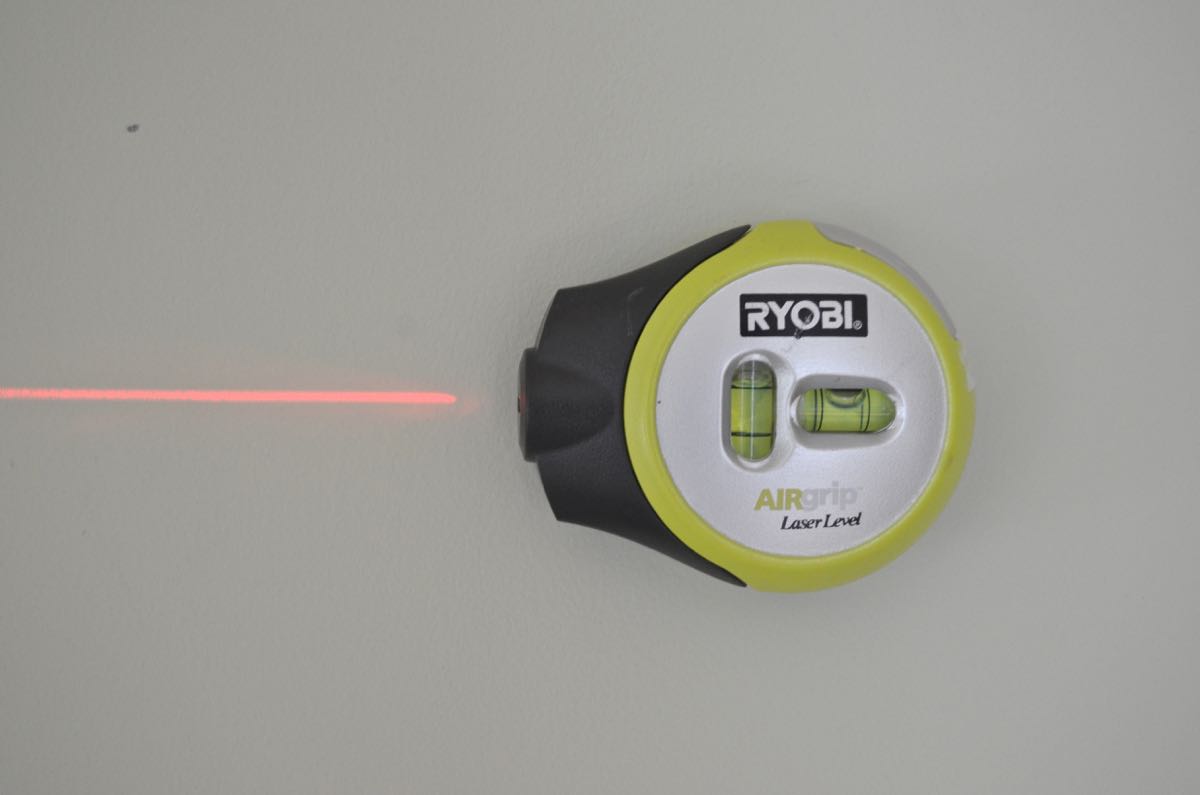
Step 3. Measure Your Frames
Measure and mark where you will need to screw in your standoff mounts. Use the laser level to make it easier. (Believe it or not, my frames are all level… we just live in a historic home without too many right angles!)
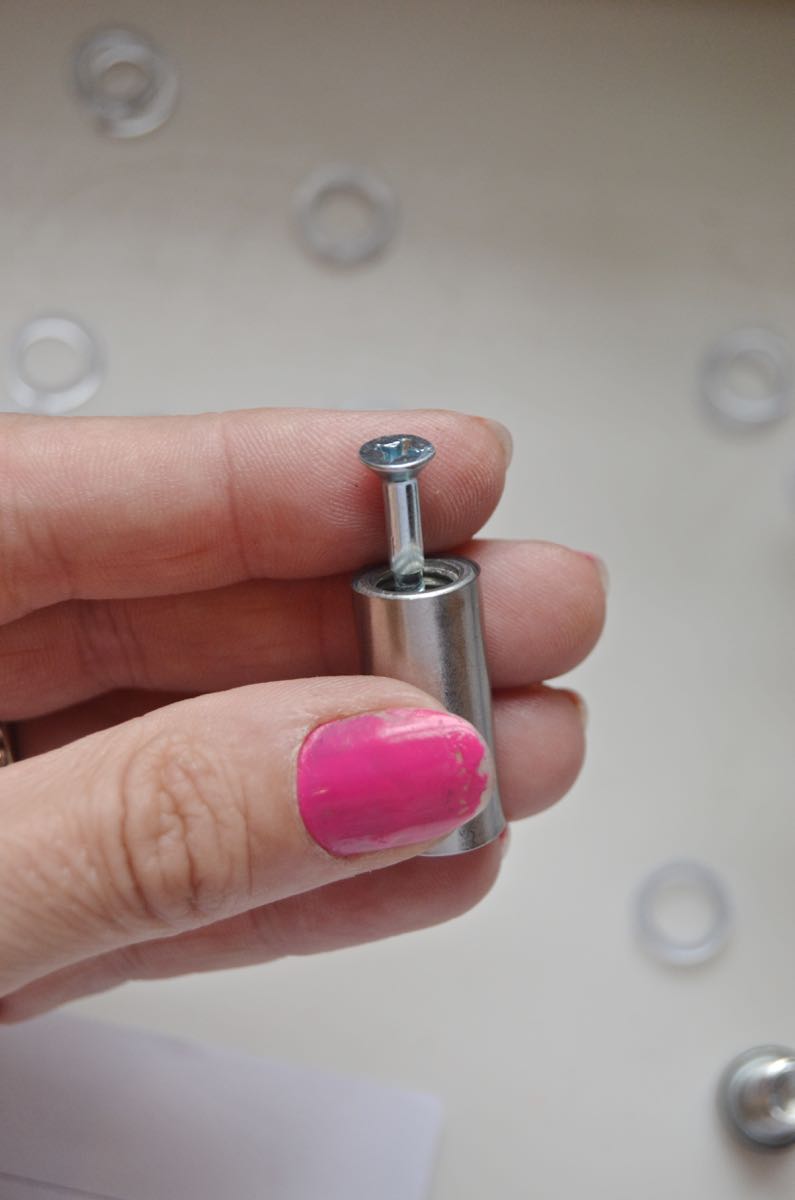
Step 4. Attach Acrylic Mounts to Wall
Attach the bottom of the standoff mounts. This is where you’ll need the special drill bit. The screw goes through the standoff mount into the wall. Later you’ll screw the cap on with the sheet of acrylic pinched between.
Step 5. Glue Artwork onto Acrylic
Glue artwork onto your acrylic. Because I’m only using one sheet of acrylic, I marked where I needed to put the dots on the back side before removing the protective film. I was then able to flip over the sheet, remove the film on the other side and, because the acrylic is clear, I could see where I’d marked to place the dots.

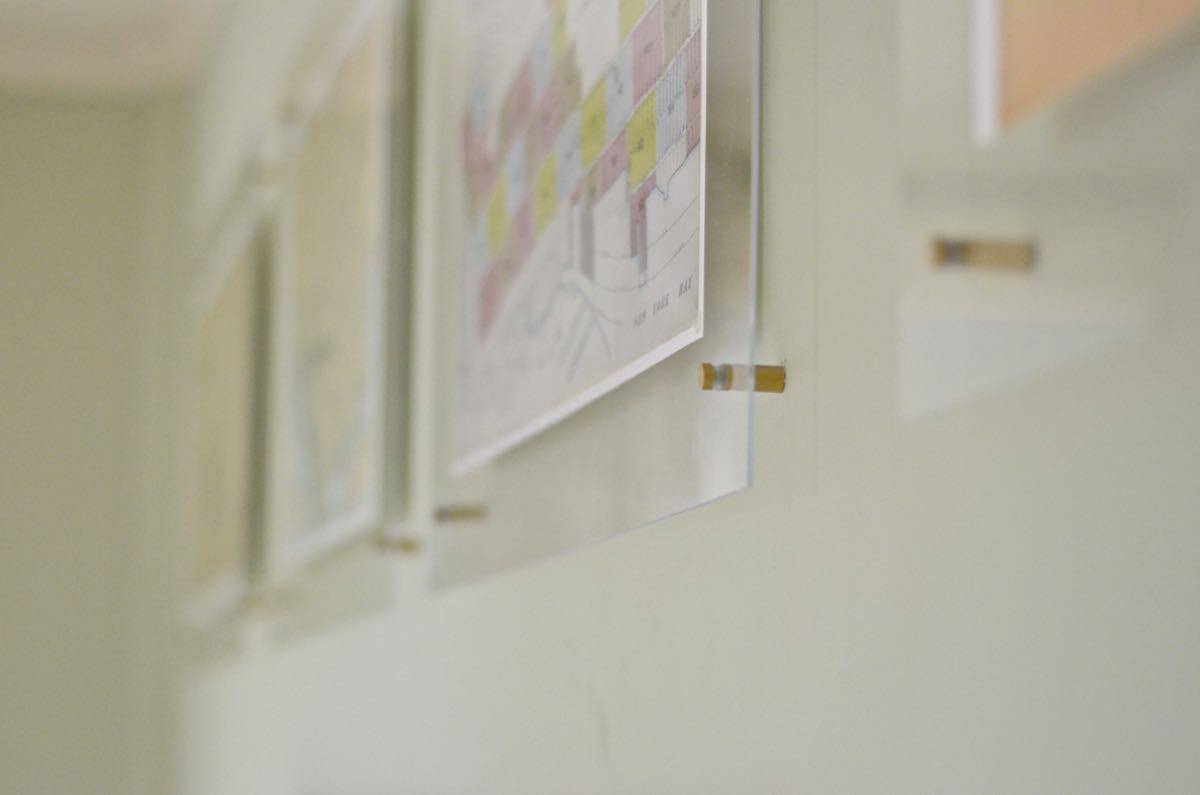
Step 6. Attach Artwork to Mounts
Screw the sheets of acrylic with maps adhered onto the standoff mounts.
Congrats- you’re done!
I love how clean and simple a floating acrylic frame is. I made one for the kids room in our old house, but DIYd the hardware. I’m thrilled by these standoff mounts and aside from the crooked ceiling, LOVE how these work over our bed. The maps make me happy (as evidenced by the maps I have hanging all over our home), but the floating acrylic frames fit the slightly more chic space that is coming together in our master bedroom. One step closer to showing you the whole room!!
Also… just for fun, I have a video on my YouTube channel about these frames!


Original article and pictures take atcharlotteshouse.com site
Комментариев нет:
Отправить комментарий