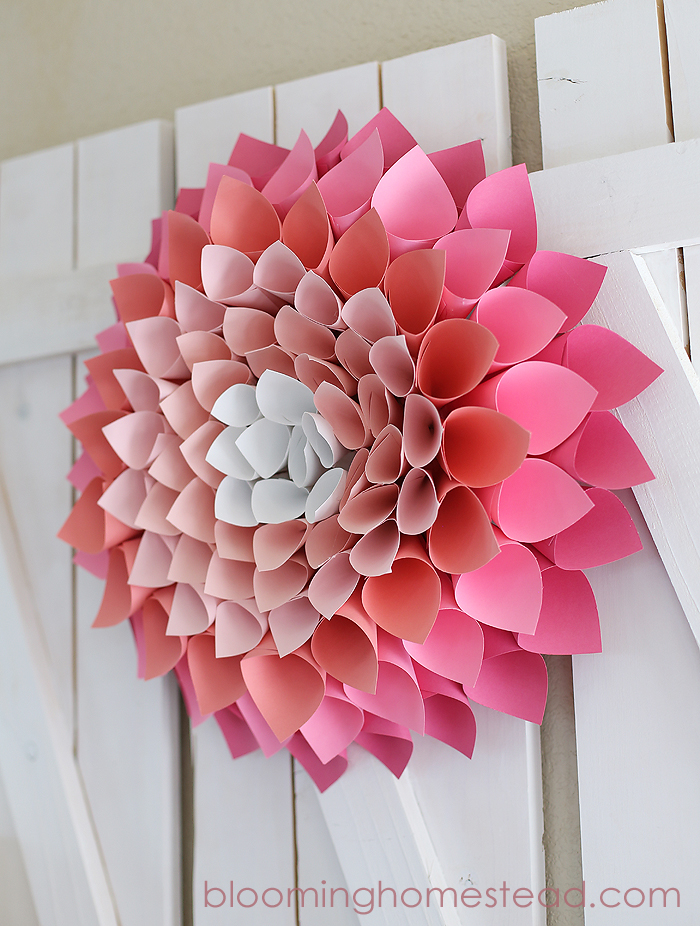
Here are the supplies needed to create your own DIY Spring Wreath:
- Several shades of pink cardstock (or color of your choice)
- Cardboard circle 12″ (cut your own or use cake rounds that are precut!)
Step 1: Trim 12×12 paper into 4×4 squares. Use several different shades of paper. For the inner layers you’ll cut smaller squares for small cones. Example: 3×3 squares, etc. You’ll end up making about 80 cones of varying sizes (but mostly the larger 4″x4″ size)
Step 2: Take squares and fold into cone shapes. (I created a youtube tutorial showing you how to make these. It was my first and most amateur video, but you’ll get the idea.
Step 3: Slowly start gluing on the cones starting in the outer edges and moving inwards. For the ombre effect, you’ll start with the darker shades on the outside with the lighter paper used on the inside.

Keep moving around until you fill in the very center! Now you’ll take a few inches of bakers twine and hot glue a “loop” on the back of the cardboard to hang your wreath.
If you need more details or want to see another version be sure and click here to learn more and watch the how-to video! I’ll be sharing my Spring Vignette this next week. I’d love to see how you’re decorating for Spring!
Looking for more DIY Spring Decor Ideas?
Original article and pictures take www.bloominghomestead.com site
Комментариев нет:
Отправить комментарий