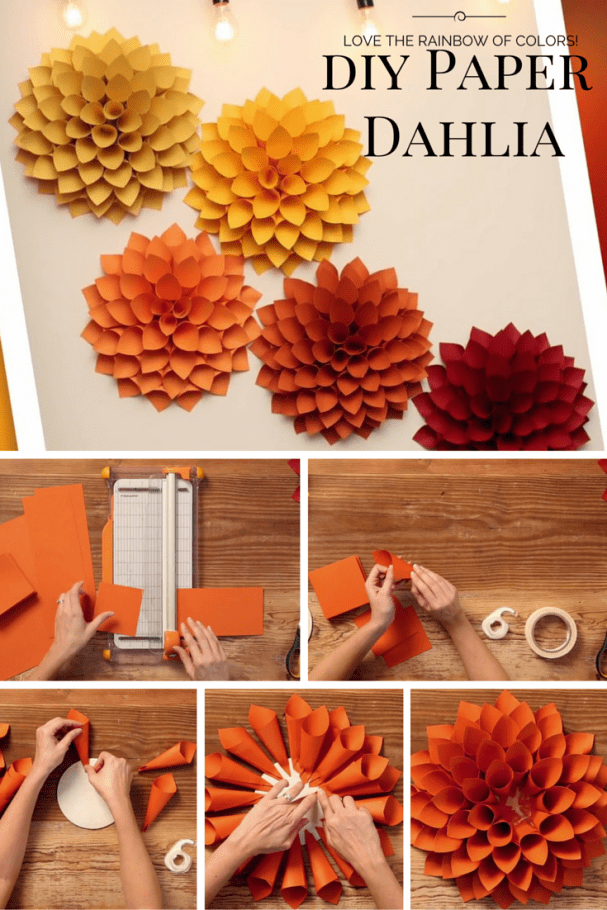
DIY Paper Dahlia – The Oversized Paper Version of the Beloved Spring Flower
DIY Paper Dahlia – The Oversized Paper Version of the Beloved Spring Flower
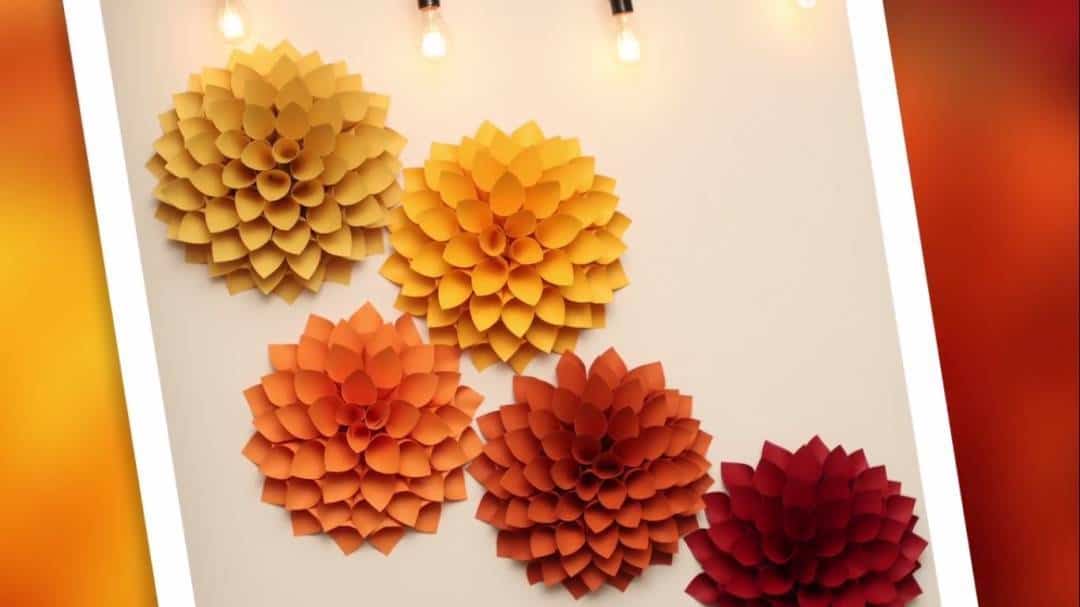
Dahlia is one of the favourite spring flowers and you can make your own oversized paper version with the materials you can easily find in a craft store. If wedding bells will ring this spring, then add these lovely paper dahlias to your special day. Celebrate the sun shining, birds chirping, trees growing and love blooming with this creative project.
What you need:
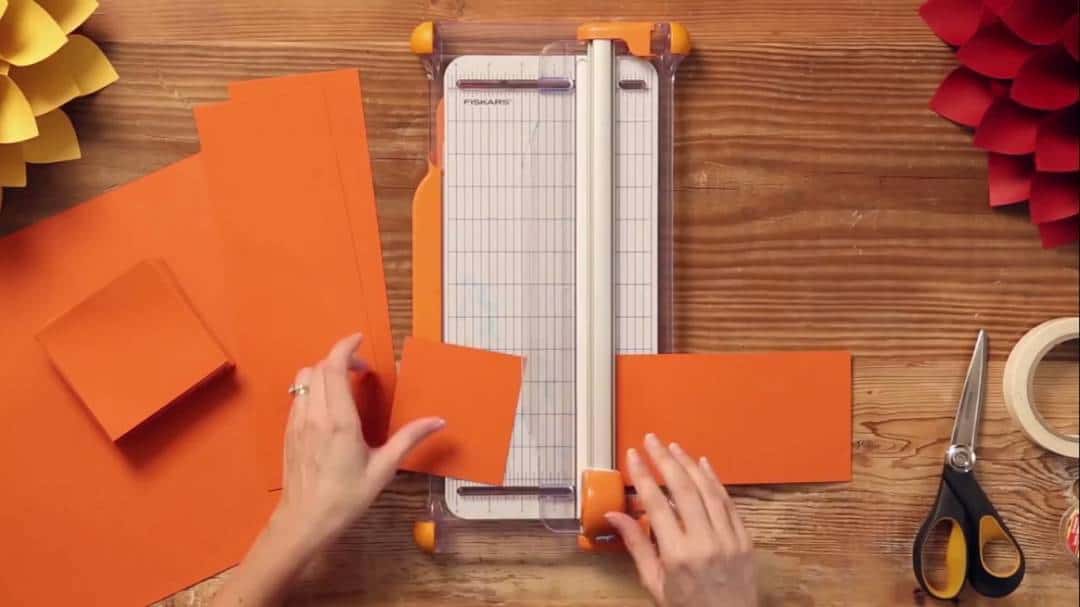
7 pieces cardstock (color of your choice)
Paper cutter
Double sided-tape
Circle cardboard
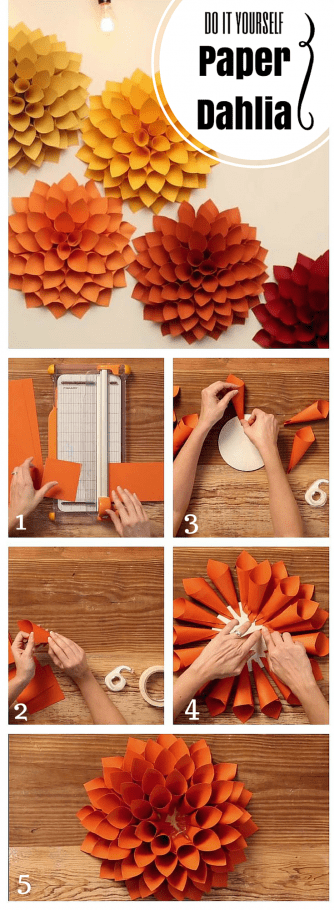
Grab the cardstocks and cut them into perfect 4-inch squares. It is better to use paper cutter for accurate and fast cut.
Step 1: Cut the cardstock into 4-inch squares.
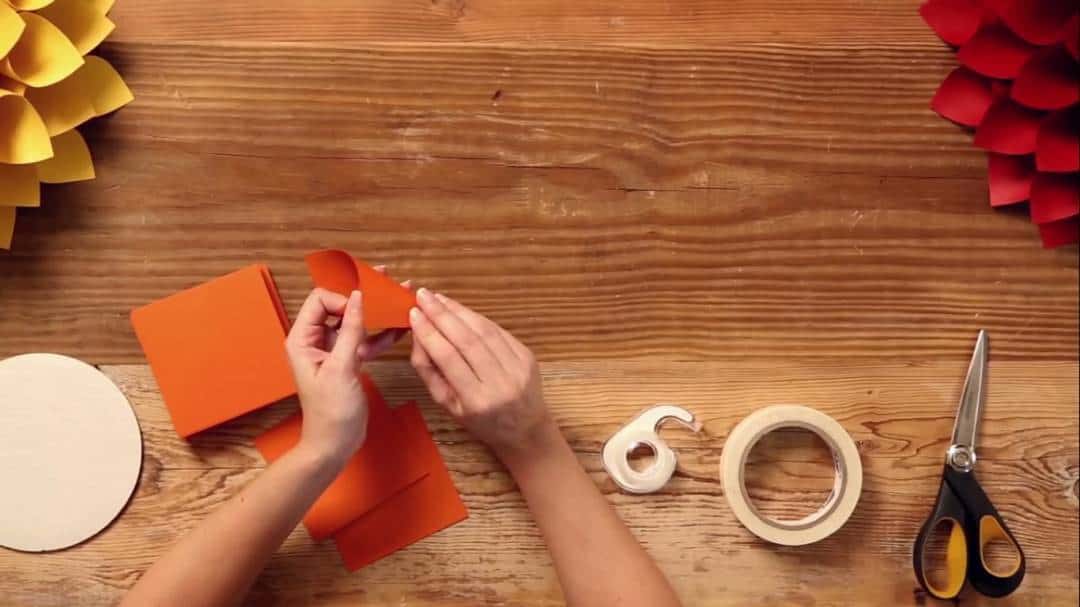
If you created about 60 pieces of squares, then you are ready to turn them into cones. Place a double-sided tape on one edge of the square. Then, bring the opposite corner about halfway across the square and bring the tape into the side over to overlap it. Secure the paper as we do not want these cones to open while we are making our flower. Repeat the process until you have 60 cones.
To make the cone, bring the opposite corner about halfway across the square and bring the tape into the side over to overlap it.
Step 2:
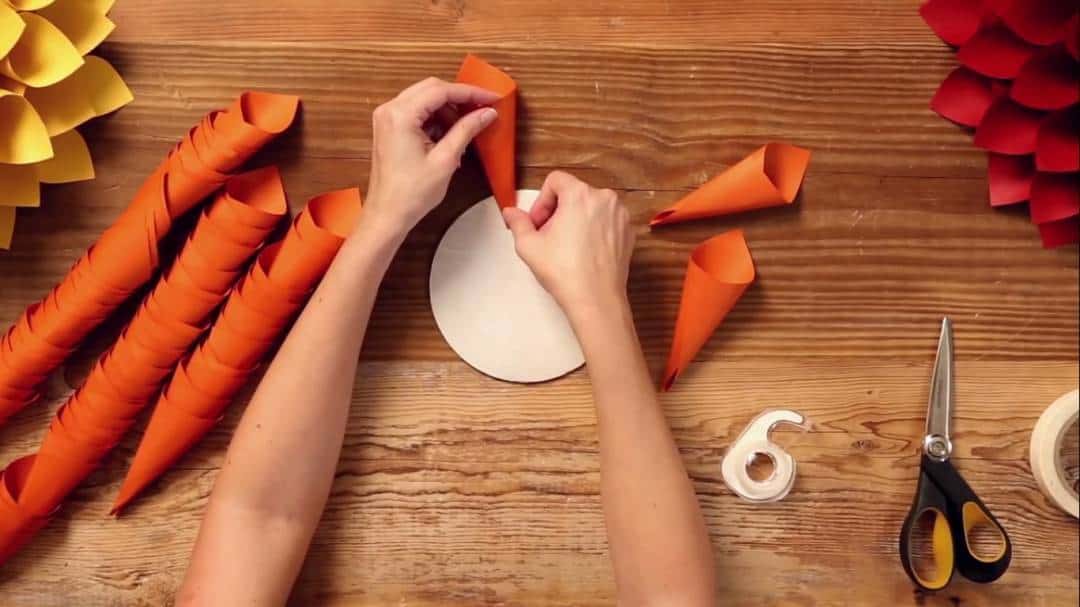
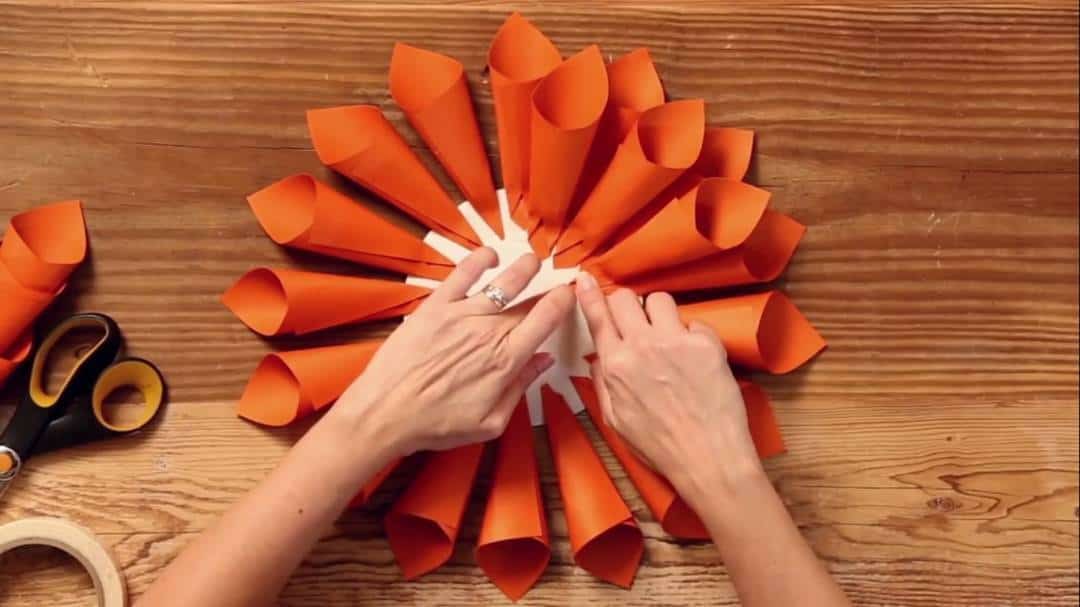
Once finished, it is time to assemble the cones on the circle base. Place one layer of double-sided tape around the outside of the base. Before placing the cones, flatten its bottom about half an inch or so. Then, carefully press down the cone on the base. Continue working around the base creating the first layer of your flower. Make sure the cones are about half an inch apart.
Step 3: Create the first layer of the flower by placing the cones around the circle base about half an inch apart.
Now, we are to create the second layer. Place the cones in between the first one. Continue working around the base.
Create the second layer by placing the cones in between the first one.
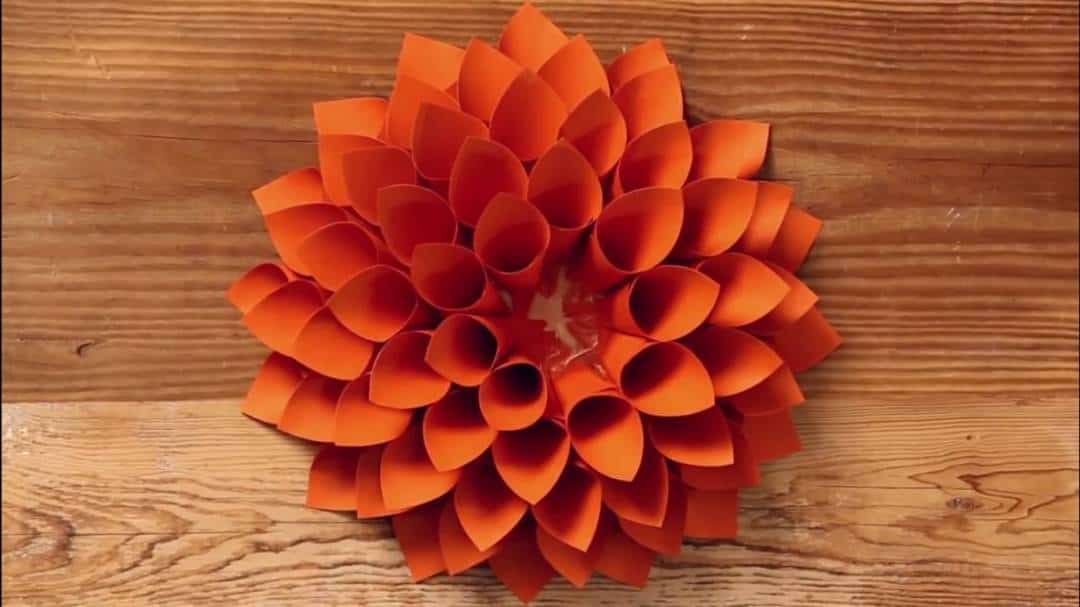
Repeat the process for the third, fourth and fifth layers.
Continue working for the third, fourth and fifth layers.
And you are done! You can make more and more paper dahlia with the color of your choice.
Step 6: Create more paper dahlia with the desired color and size.
Watch How it is Done
Save All the Steps Above using this Bookmarklet
Original article and pictures take www.inspiredbride.net site

Комментариев нет:
Отправить комментарий