Hello friends! I’m back today to share a tutorial on how to make these painted baseball Mason jars! These were perfect utensil caddies for the baseball themed baby shower I co-hosted over the weekend.
If you haven’t seen how the baby shower turned out, be sure to click here and check out all the adorable details!
Now, let’s jump right into this tutorial! This post contains some affiliate links for your convenience. Click here to read my full disclosure policy.
Materials Needed:
- Mason Jars
- I used pint size jars. This size works well for holding utensils.
- FolkArt Multi-Surface paint in white
- Most brands of acrylic craft paint should work. Do check the label to be sure it will work on glass.
- red paint pen
- jute twine
- rubbing alcohol
- paintbrush
- sandpaper
- 80 or 100-grit works best
*I don’t think it matters what brand of Mason jar you use, although if you plan to distress your finished jar, being able to highlight the “Ball” branding is pretty cute!
Tutorial:
1.) Clean the jars. Wash each jar with warm, soapy water and dry completely. Wipe down the exterior with rubbing alcohol to be sure they are squeaky clean.
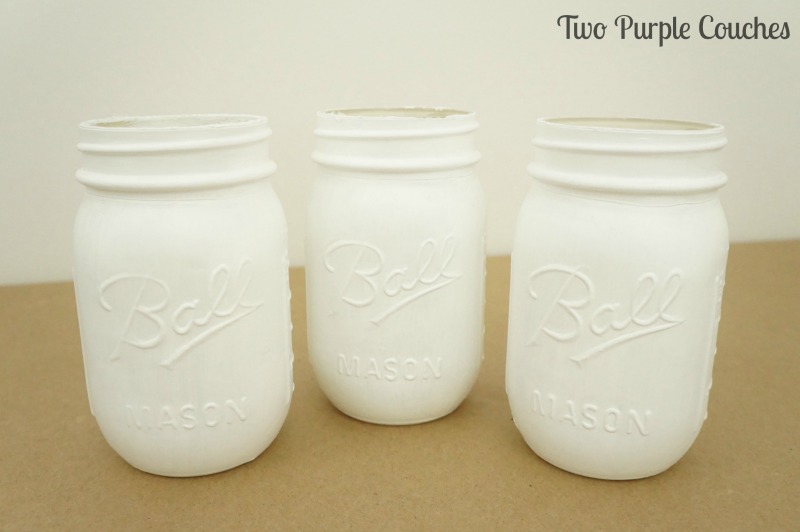
2.) Paint each jar. Using FolkArt Multi-Surface paint, I started painting at the mouth of the jar, then flipped it upside-down on top of a paper towel to coat the bottom half. Paint one light coat and allow to dry overnight before applying another coat. Trust me on the overnight part; the paint needs to be completely dry before the second coat of paint is applied. I tried to paint a second coat once the first was dry to the touch and the paint started peeling off.
I applied a total of three coats, allowing each to dry overnight before applying the next.
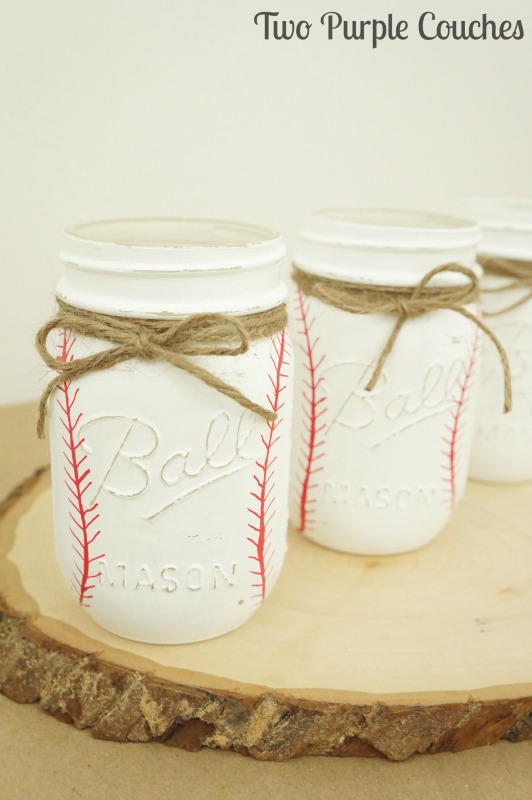
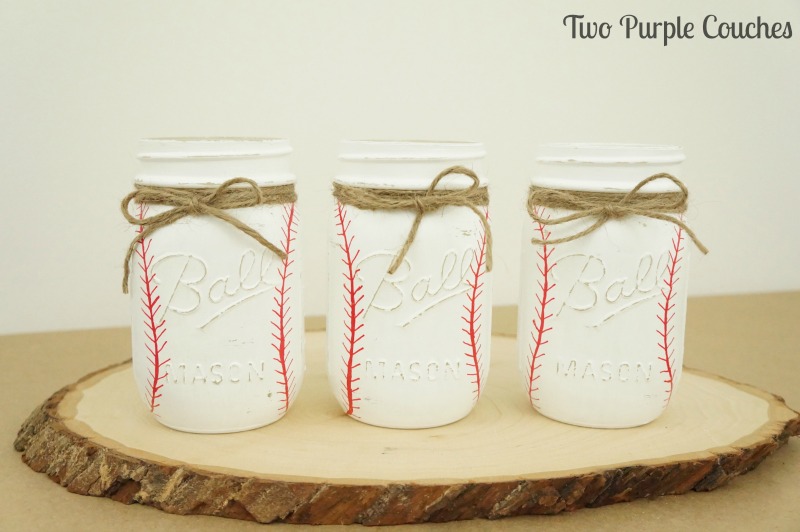
3.) Add the stitching detail. I used a red paint pen (I had a Sharpie brand paint pen on hand) for this step. Draw a curved line down each side of the jar, beginning just under the lip and ending at the bottom of the jar. Then draw arrow-like hash marks to create the “stitches”.

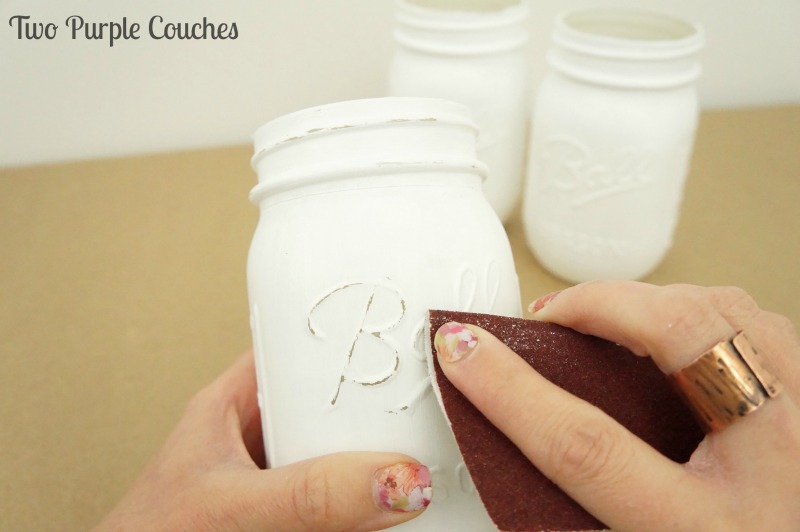
4.) Distress jars with sandpaper. As you can see above, I’d already done some distressing before I added the stitches. You can do either step first. Use a small piece of 80-grit or 100-grit sandpaper to do some light distressing across the threads of the jar, the measurement lines and the “Ball” script (if using Ball brand mason jars). If distressing isn’t your thing, skip this step.
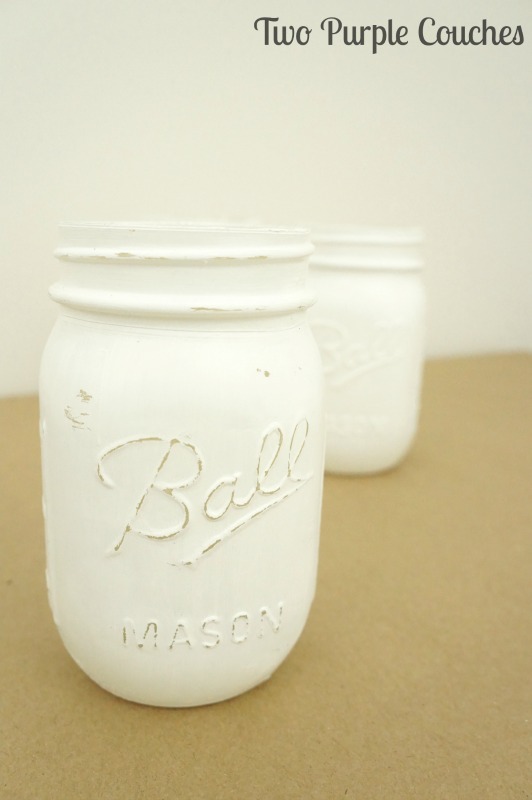
Here’s how my jars looked looked after I distressed them:
5.) Tie twine around the jars. For the finishing touch, I wrapped a few inches of jute twine around the top of the jar, just under the lip, and tied it off into a bow. Not necessary, but I thought it was a cute touch!
Before adding the utensils for the party, I carefully rinsed the inside of each jar, as some paint had flaked to the bottom while I was sanding.

While these painted baseball mason jars make perfect utensil caddies, you could also add flowers and make them into vases, or add the lids and use them as a bank or gift jar! There are so many possibilities!
Baseball Baby Shower Series
Here is the full collection of baseball-themed baby shower projects and tutorials for you to reference. These projects would also work well for a baseball or sports-themed birthday party. I hope you find some inspiration
Sharing with: Inspiration Monday / Lou Lou Girls Fabulous Party
Original article and pictures take diyjoy.com site
Комментариев нет:
Отправить комментарий