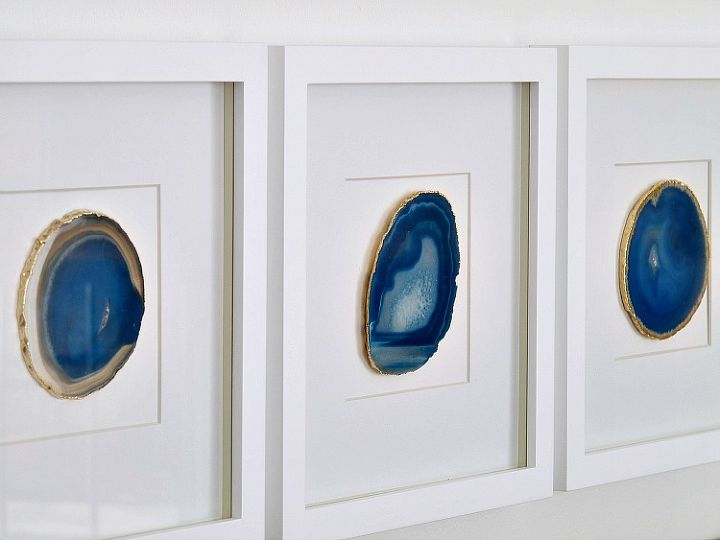
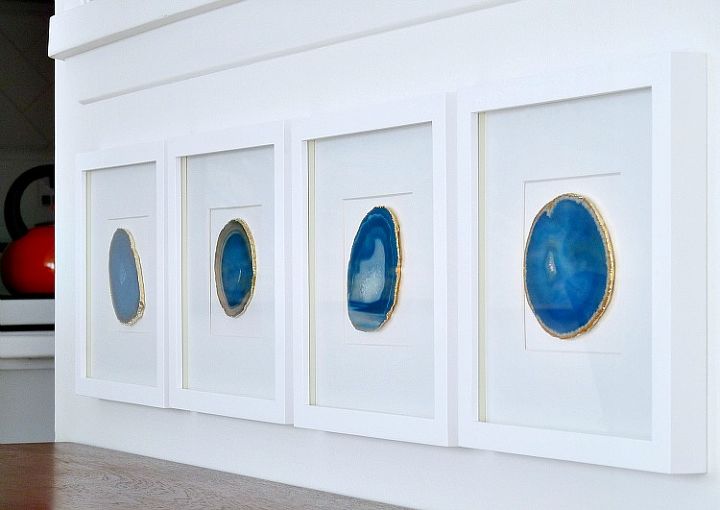
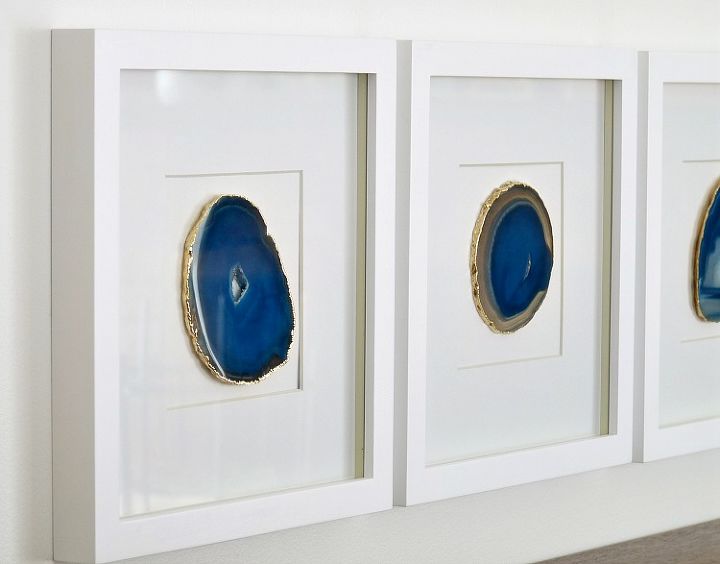
After lusting after some framed agate art - with a startling, $300 price tag - I decided to make my own. I was lucky enough to find a gorgeous set of teal agate slice coasters at a discount home goods store for $20. They already had a beautiful gold edge, too! Agate slices like this can be found on Ebay and Etsy as well.
This really is a super simple DIY project, but the secret is in the supplies:
Agate slices (try Etsy, Amazon, or look for local gem shows or shops in your area)
Square matted frames (mine are 5"x5" Wood Gallery Single Opening Frames from Pottery Barn)
Gel Epoxy (designed for slippery surfaces like stone - I like the LePage brand)
Glue stick
White cardstock paper and cardboard
Toothpick or wood skewer

I can vouch for this Epoxy because everything I make with it holds strong - and I've been testing it for years. If you want to try this project and can't find this brand, ask the pros at your hardware store. I've heard good things about E3000 jewellery glue too, but I've never used it myself.
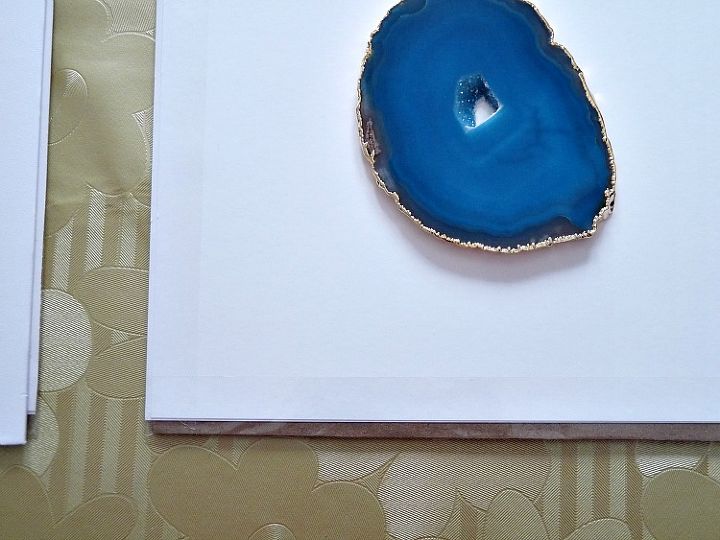
First I created a backing for the agate by gluing two sheets of white cardstock paper together and then to the cardboard backing that came with the frames. I kept the glue to the area behind the matting, in case it crinkled or stained the paper. I added some packing tape to be doubly sure, but I think this was a touch neurotic. It's tricky to photograph, but you can see the backing in the photo above. If you could track down a really heavy duty white backing, you can totally skip this step. You just want a nice solid surface.

I mixed together the two-part epoxy and applied it with a wooden skewer (toothpick works) to the most opaque sections of the stone, keeping away from the edge to avoid squishing epoxy out the sides. Then I eyeballed the center of each matting and gently pressed the agate in place, wiggling it a little.
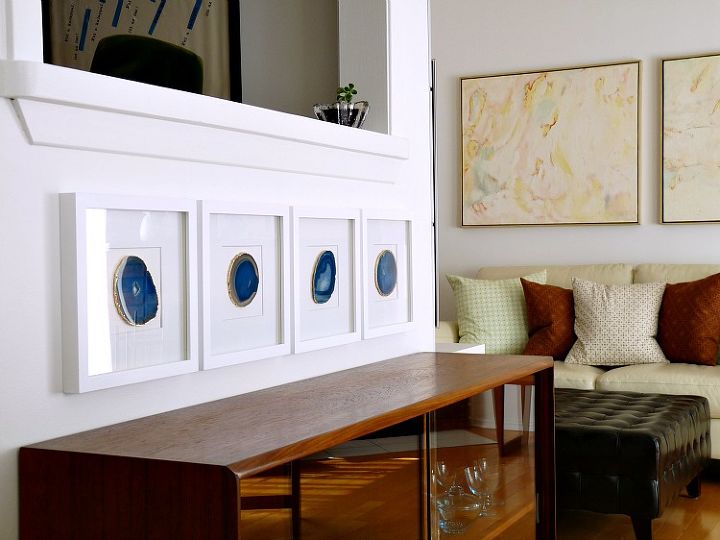
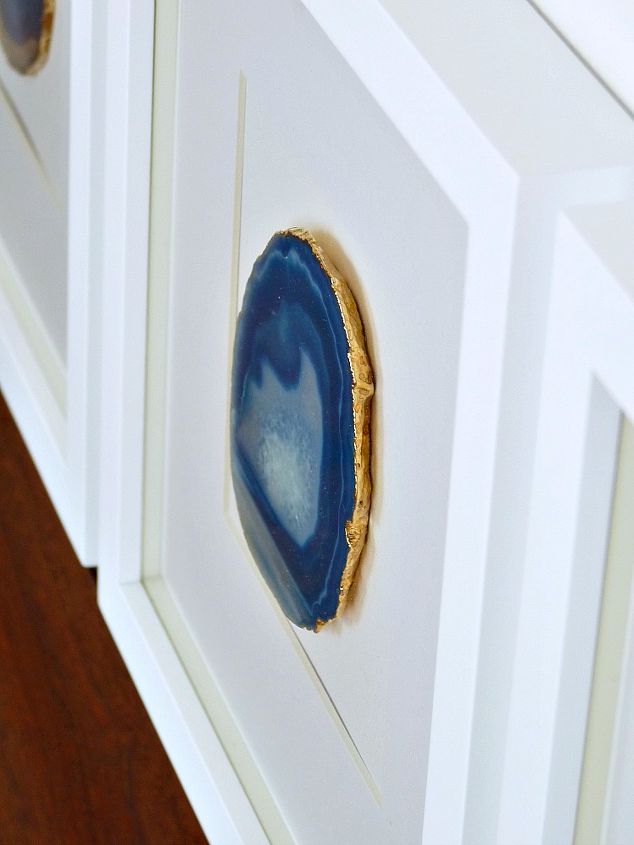
I'm really thrilled with how this project turned out and, a year and a half later, they still look perfect. The glue has held on (knock on wood). These were photographed in my former home and it took my awhile to find the perfect spot in my new lakehouse. I'll be sure to post new pics soon!
To see more: http://dans-le-townhouse.blogspot.ca/2013/04/my-diy-agate-art.html
4 Questions on This ProjectSee All
Suggested Project Book
Original article and pictures take cdn.hometalk.com site
Комментариев нет:
Отправить комментарий